A client sends over a batch of 360° interiors and the files look rough. The living room is noisy, the hallway is underexposed, and the kitchen panorama has just enough blur to make every fixture feel soft. That's the point where AI photo enhancement either saves the shoot or wastes the afternoon, because not every bad image deserves the same fix.
The practical problem isn't whether the software can make something look prettier. It's whether the source file still contains enough real information to support a trustworthy virtual tour. For creators who handle property, hospitality, campus, and venue imagery, that decision has to happen fast, before the post-production queue turns into a pile of avoidable rework.
Table of Contents
- When AI Photo Enhancement Saves the Shoot
- How AI Enhancement Algorithms Work
- Building Your 360° Image Enhancement Workflow
- Choosing the Right Enhancement Technique for Each Problem
- Knowing When AI Enhancement Crosses the Line
- Optimizing Enhanced Images for Web Performance and SEO
- Troubleshooting Common Enhancement Failures
When AI Photo Enhancement Saves the Shoot
A weak 360° batch usually shows the same three problems. The file is grainy because the ISO climbed too high, one direction of the panorama is too dark, or the source capture is a little soft because the camera was not steady. In those cases, AI photo enhancement can recover usable detail, especially when the room is otherwise well composed and the blur is mild rather than structural.
The first 60 seconds tell the truth
A quick triage saves more time than any preset. Check whether straight lines still hold, whether text on signs remains readable, and whether furniture edges are recognizable without guessing. If the image is only dirty, dull, or slightly rough around the edges, enhancement usually helps. If the frame is badly out of focus or heavily underexposed, it usually needs a re-shoot.
Practical rule: improve the file only when the scene is already captured correctly in substance. Enhancement should polish reality, not rebuild it.
For property work, this matters because the photo has to support trust. A useful reference for the capture side is David Beshay's home selling photo advice, which reinforces the same idea from the shooting side, make the file strong before post ever touches it. The same logic appears in Virtual Tour Easy's realty photography tips for 2026, where capture discipline comes before editing rescue.
A fast salvage checklist
- Denoise first if the grain is obvious. Grain is easier to remove than fake detail is to invent.
- Reject frames with major motion blur. AI can sharpen edges, but it cannot reliably recover movement smear.
- Keep images with correct geometry. A slightly dark room is workable, a warped panorama is not.
- Watch for missing content. A chair hidden behind a blown highlight is different from a chair that never made it into the frame.
- Ask whether the client needs accuracy or mood. Listings, venues, and campuses usually need accuracy first.
The commercial market reflects that shift from novelty to routine use. One report values the AI photo enhancement market at USD 1.42 billion in 2024 and projects USD 6.94 billion by 2033 with a 19.8% CAGR source. A broader estimate places the AI image enhancer market at USD 2.6 billion in 2024 and forecasts USD 50.7 billion by 2034. Those projections matter because the day-to-day decision is no longer “Should this be edited?” but “Should this be enhanced or reshot?”
How AI Enhancement Algorithms Work

The tools behind AI photo enhancement are pattern learners, not magic filters. They inspect pixels, compare them with training data, and estimate what should be there next. In practice, that lets a model reduce noise, correct color, sharpen edges, and rebuild plausible detail in a single pass because it works at the pixel level instead of applying a static preset source.
CNNs, GANs, and diffusion models in plain language
A convolutional neural network, or CNN, is the pattern detector. It scans an image for repeated structures, edges, and texture cues, which is why CNN-based tools are strong at telling noise apart from real detail.
A GAN, or generative adversarial network, works with a generator and a critic. One part creates a candidate image, the other checks whether the result looks real enough, which pushes the output toward believable texture instead of obvious smearing.
A diffusion model starts with noise and removes it step by step until a coherent image appears. That is why diffusion-based super-resolution can infer high-frequency detail during upscaling instead of only stretching pixels. Google Brain's SR3 and Cascaded Diffusion Models showed a research example where a 64×64 image was expanded to 1,024×1,024 source.
Why some results look natural and others look fake
Natural-looking output usually comes from restraint. The model has enough real signal to guide reconstruction, so it can smooth noise without inventing new surfaces. Artificial results show up when the source file is too thin, the enhancement strength is too high, or the scene contains repeating structure like tiles, railings, carpet, or window grids that the model guesses wrong.
For 360° imagery, that difference matters. A tool that handles a portrait well may still struggle with a stitched hallway or a curved ceiling line. The best algorithm is the one that preserves geometry while improving clarity.
Building Your 360° Image Enhancement Workflow
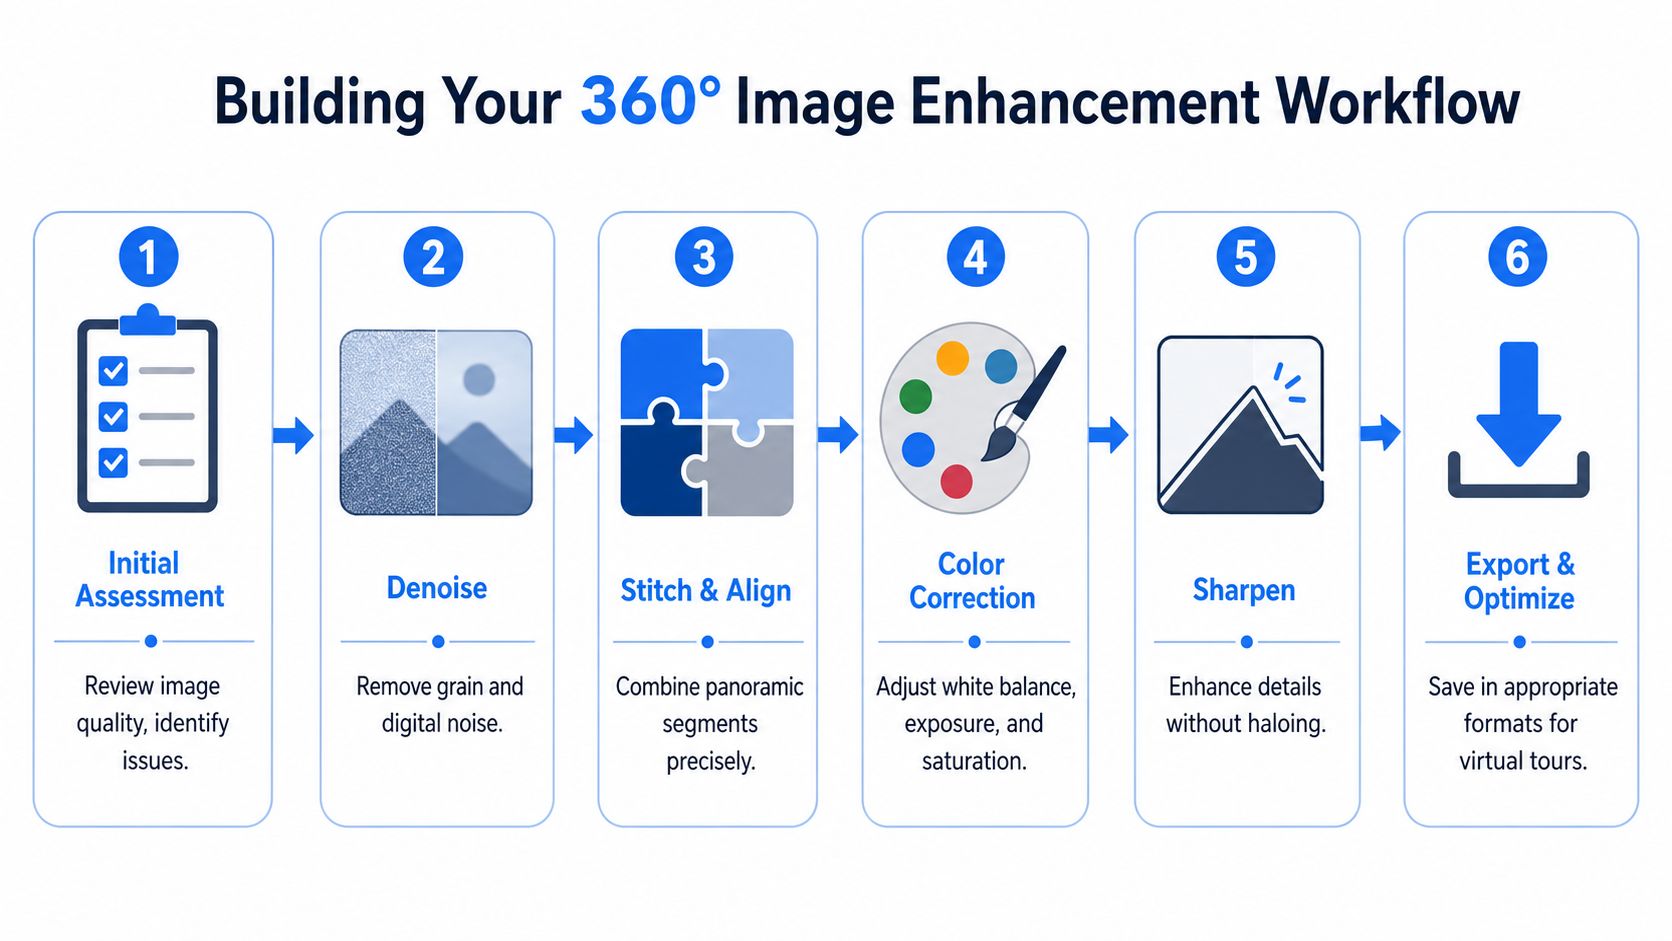
A reliable workflow starts before enhancement software opens. Review the full pano for stitching errors, obvious exposure imbalance, and any area where the original capture has already lost credibility. The order matters because denoise before sharpen and enhance before crop or resize keeps the model from amplifying problems that could've been cleaned first.
The sequence that protects quality
- Initial assessment. Separate salvageable scenes from obvious reshoots.
- Denoise. Remove grain and digital noise while the image is still full size.
- Stitch and align. Fix panorama alignment before any creative work.
- Color correction. Balance white point, exposure, and saturation together.
- Sharpen. Add clarity only after noise has been reduced.
- Export and optimize. Save in the format and size the tour needs.
This order supports consistency across multiple scenes, which matters more than one hero frame. A hotel tour with bright lobby shots and dark corridor shots needs the same visual language throughout, or the tour feels stitched together from different days. In mixed-light interiors, HDR merging can help before enhancement, but the merge has to stay faithful to window edges and reflective surfaces.
Keep the enhancement pass boring. If a ceiling or wall starts looking more attractive than real, the file has already gone too far.
For teams building tours in a visual editor, VirtualTourEasy's AI photo enhancer can sit upstream of scene assembly, so the tour uses cleaner source images from the start. That kind of workflow is especially useful when the tour has to include info panels, hotspots, and alternate starting views without quality mismatches showing up from one scene to the next.
The export stage also affects review quality. Preserve metadata and EXIF where possible so the file history stays intact for internal checks. For practical image-setting guidance, Virtual Tour Easy's image quality settings notes are worth keeping close during handoff. For teams that need a broader content workflow around immersive media, BEDHEAD's page on cut mattress returns with 360 images is a useful reminder that consistent image quality supports more than just tours, it also supports product presentation.
Choosing the Right Enhancement Technique for Each Problem
A virtual tour file rarely has one problem in isolation. One pano may be noisy, slightly soft, and a bit warm from mixed lighting. Another may have solid exposure but a warped edge, a stitched seam, or a sky that needs help. The right fix depends on the defect, and the order matters because the wrong pass can make later edits harder to control.
Denoising works well on speckled interiors and high-ISO captures, but it can wipe out texture if the settings are too aggressive. Upscaling helps when the source file is too small for the final use, though it can also invent detail that looks convincing without being real. Color correction can bring a flat or tinted scene back into balance, while perspective work, sky replacement, and stitching repair each solve narrower problems and should stay in that lane.
| Enhancement Technique for 360° Virtual Tours | Best For | Limitations | Virtual Tour Use Case |
|---|---|---|---|
| Denoising | Grainy interiors, high-ISO captures | Can wipe out texture if pushed too hard | Dim apartment, hotel, or classroom scenes |
| Upscaling | Small source files, soft exports | Can invent believable but incorrect detail | Web hero images and close-up amenity views |
| Color correction | Mixed lighting, white-balance drift | Won't fix blur or stitching issues | Lobby-to-room transitions and venue halls |
| Grain reduction | Harsh sensor noise | May flatten fabric, wood, and stone detail | Low-light hospitality photos |
| Perspective adjustment | Slight vertical tilt, architectural lean | Can distort edges if overused | Real estate exteriors and corridor lines |
| Sky replacement | Flat outdoor skies | Can look artificial in reflective glass or wet surfaces | Exterior entrances and campus walkways |
| Panorama stitching | Misaligned source frames | Cannot rescue badly captured overlap | Multi-shot 360 interiors |
Combine only what the frame needs
The cleanest results usually come from limited edits stacked in the right order. A dark hotel room may need denoising first, then color correction. A noisy outdoor shot may only need light grain reduction and a careful exposure lift. If the architecture is already crooked, fix perspective before sharpening, or the sharpening pass will emphasize the wrong edges and make the frame harder to trust.
Generative tools aimed at creative transformation, such as revid.ai's photo to anime transformation, show how far an edit can drift from documentation. That contrast matters for 360° tour work. The goal is clarity with restraint, because clients want a space that looks clean and readable without losing the actual room, finish, or line of sight.
Over-processing tends to show up in the same places. Window frames turn crunchy, upholstery goes waxy, and wood grain starts to look printed. Once that happens, the image stops serving the space and starts advertising the software.
Knowing When AI Enhancement Crosses the Line
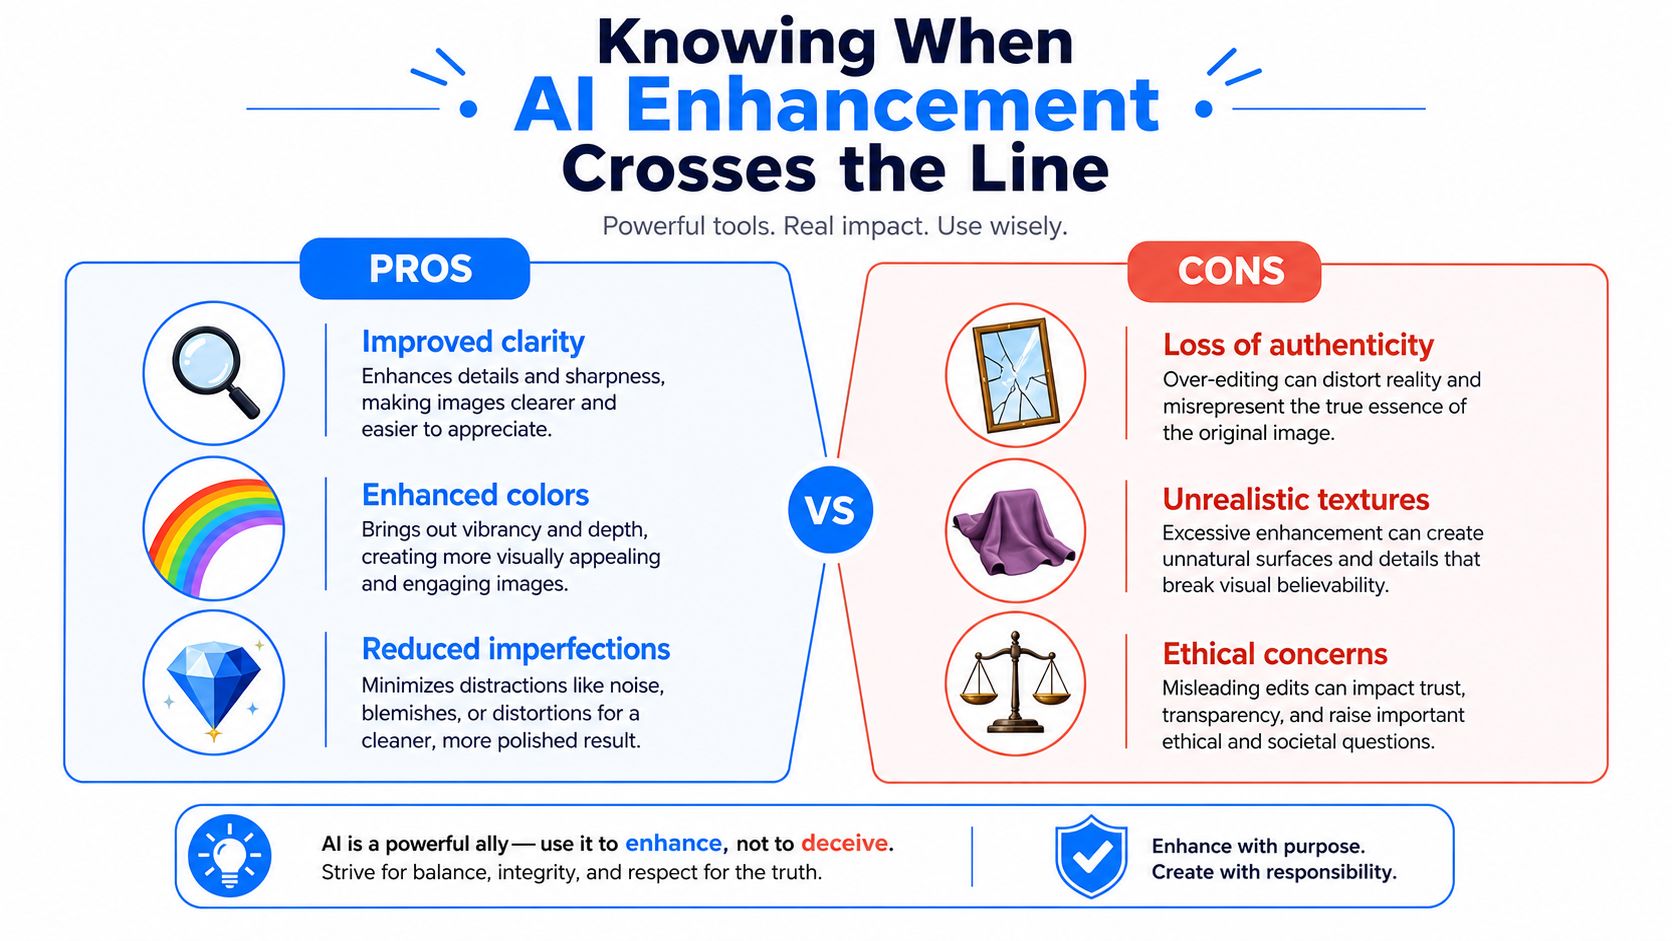
The hard boundary is simple. Enhancement improves what was captured, alteration creates what wasn't. That line becomes blurry when a low-resolution image is upscaled so aggressively that new texture looks convincing, but the viewer can no longer tell whether the grain in the countertop was real or synthesized.
Keep the image honest
- Real estate: protect layout accuracy, window views, and finishes. If a room feels larger or cleaner than reality, the listing starts to mislead.
- Hospitality: maintain atmosphere, but don't add surfaces, remove wear, or over-polish guest areas into something unrecognizable.
- Education and institutions: preserve signage, fixtures, and accessibility details. Those visuals have documentary weight, not just marketing value.
The most useful review workflow is a second human pass. Someone who knows the space should verify that the enhanced image still matches the room, the object, and the client's disclosure rules. That review is especially important when upscaling low-resolution files, because plausible details can slip in without drawing immediate attention.
If a client asks for a result that changes the place instead of clarifying it, the request needs a policy, not a preset.
That policy should define what gets approved, what gets disclosed, and what gets rejected. It should also distinguish between a cleanup pass and a generative edit, because the industry is moving beyond simple sharpening into edits that can alter perspective and angle. The more ambitious the tool, the more important the sign-off process becomes.
Optimizing Enhanced Images for Web Performance and SEO
Enhanced images still have to load fast. A crisp panorama that stalls on mobile helps nobody, not the visitor, not the marketer, and not the search result. Once the visual work is done, the next job is to compress and serve the image without undoing the quality gains.
Make quality and speed work together
The safest pattern is to export the best-looking image first, then create the delivery version separately. That keeps the source archive clean while letting the web version stay lean. Responsive delivery matters too, because a desktop visitor doesn't need the same file weight as someone opening a tour on a phone.
Metadata helps as well. Search engines and platform tools understand images better when filenames, alt text, and surrounding page copy describe the space clearly. For teams that need bandwidth-aware tour delivery, Virtual Tour Easy's bandwidth-efficient guidance is a useful companion piece for balancing appearance with page speed.
Enhanced 360° imagery also supports SEO indirectly through engagement. When a tour loads quickly and the scenes look coherent, visitors are more likely to stay, click hotspots, and move through the space instead of bouncing after the first frame. That doesn't come from the enhancement alone, it comes from pairing enhancement with practical optimization and disciplined publishing.
Troubleshooting Common Enhancement Failures
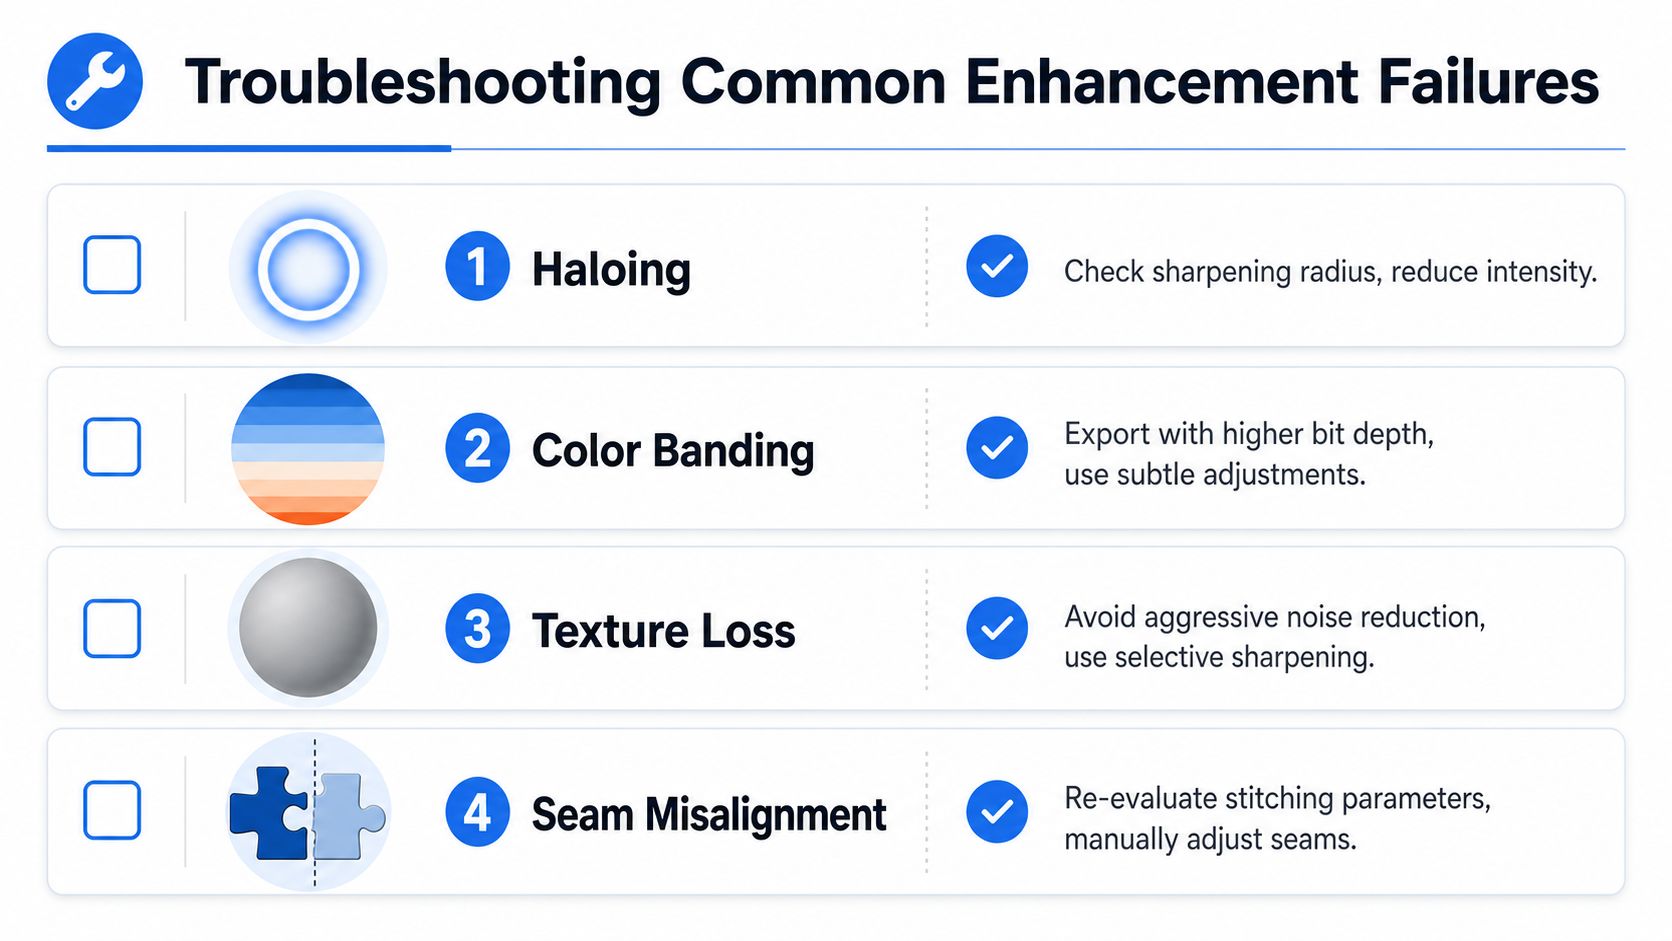
Most failures show up as visible artifacts, not abstract quality issues. Haloing usually means sharpening was too strong. Banding often comes from shallow color adjustments or weak export settings. Texture loss points to excessive noise reduction. Seam misalignment means the pano needs stitching attention, not another enhancement pass.
Fix the symptom at the source
- Haloing: lower sharpening strength and reduce the radius.
- Color banding: export with more care and keep tonal changes subtle.
- Texture loss: back off heavy denoising and use selective sharpening.
- Seam misalignment: revisit stitching parameters and adjust the seam line manually.
AI-generated details that look wrong usually trace back to weak source material, not a bad setting alone. The safest response is to step back one stage in the workflow, then reprocess with less intensity. If the same issue appears across multiple scenes, the capture process is the underlying problem, not the enhancement tool.
Virtual Tour Easy gives creators a practical way to prepare cleaner 360° scenes before they enter a tour builder, with AI photo enhancement, scene assembly, and sharing tools in one workflow. If the next batch of images needs to look sharper without drifting away from the actual space, visit Virtual Tour Easy and test it against a live property, venue, or campus set.