Most camera real estate photography advice starts with the wrong purchase. It pushes megapixels, sensor sizes, and expensive bodies before asking how quickly a team needs to publish a complete listing package. A modern property launch may need still images, a cinematic walkthrough, a 360° tour, and short-form clips, so the practical question is no longer which camera produces the most impressive file. It's which capture workflow creates accurate, polished, reusable content without slowing the listing down.
The shift is visible in the market. Professional real estate photography was valued at $1.2 billion in 2022 and is projected to reach $2.8 billion by 2030, with an implied 11.2% compound annual growth rate, according to this real estate photography market summary. The same source reports that U.S. real estate photography services generated $850 million in 2023, while demand rose 45% from 2020 to 2023. That growth reflects a move toward paid, digital-first visual production, not a race for better camera specifications.
Table of Contents
- Why Workflow Matters More Than Camera Specs
- Choosing the Right Camera and Lenses for Property Shoots
- Mastering HDR Bracketing and Panorama Capture Techniques
- Lighting Techniques and Tripod Positioning for Every Room
- Post-Processing and Building Virtual Tours with VirtualTourEasy
- Troubleshooting Common Issues and Tips for Different Audiences
Why Workflow Matters More Than Camera Specs
An expensive camera can still produce a weak listing package if the photographer spends too long changing lenses, misses the best exterior light, captures unusable brackets, or delivers files that need extensive correction. A modest but well-matched setup, paired with a repeatable room-by-room process, often creates more value than a premium body used without a plan.
The deliverable has also expanded. One industry summary reports that around 22% of home listings include a virtual tour, while 82% of agencies use drones and 10% of agents use video in their marketing mix. The same source cites professional photographs selling 32% faster and listings with 20 or more high-quality photos receiving 118% more views on Zillow. Those figures come from the Matterport real estate photography statistics overview, and they point to a clear operational lesson. A team that captures only stills may be leaving important formats to a separate, slower production cycle.
The publishable package is the real unit of work
A workflow-first photographer plans each property around outputs:
- Listing stills: Clean, level, naturally edited photographs that show layout and condition accurately.
- Immersive media: 360° scenes or a navigable tour that helps remote viewers understand the relationship between rooms.
- Motion content: A cinematic walkthrough that can be shared on listing pages, social channels, and agent websites.
- Supporting assets: Detail images, exterior views, amenity coverage, and appropriately cropped files for different platforms.
The camera matters, but composition and format often matter more than a raw sensor upgrade for web-first listings. Buyers generally need to understand scale, flow, light, and condition. A technically perfect file that gives no sense of circulation through the property is less useful than a well-composed image captured on a simpler system.
AI-assisted editing changes the economics further. Computational HDR, perspective correction, object cleanup, and color balancing can reduce repetitive post-production, while mobile cameras now offer high-resolution capture and computational enhancement. That doesn't make professional cameras irrelevant. It means the photographer should spend equipment money where it removes a production bottleneck.
Practical rule: Buy the tool that shortens the path from capture to approved delivery, not the tool with the most impressive specification sheet.
The workflow also affects scheduling. A photographer who captures stills, panoramic source images, and walkthrough footage during one organized visit avoids repeated access coordination. The listing team gets a coherent visual story, and the property doesn't need to be restaged for every format.
Choosing the Right Camera and Lenses for Property Shoots
The right kit depends on the client's expectations, the property's spatial complexity, and the required turnaround. Full-frame mirrorless systems remain a strong choice for demanding still work, but APS-C cameras and smartphones can make sense for volume operations where speed and consistency outweigh extreme flexibility.
A full-frame mirrorless body paired with a wide-angle zoom is the most versatile professional combination. A lens covering roughly 16mm to 35mm on full frame works well for living rooms, kitchens, bedrooms, and exterior architecture. Wider settings help in compact bathrooms or narrow hallways, but extreme width can exaggerate room dimensions and bend architectural lines. The photographer should use the widest focal length that represents the space accurately, not the widest setting available.
APS-C systems can serve agents and property teams producing a large number of standard listings. The crop factor changes the effective field of view, so the lens must be selected accordingly. A wide zoom designed for APS-C can cover interiors effectively, while the smaller body and lighter lenses may reduce fatigue during high-volume shoots.
Smartphones occupy a separate but useful category. Current phone cameras can reach 48MP and use computational HDR and AI enhancement, as noted in this 2026 real estate photography equipment guide. For a quick rental update, a lightly furnished unit, or a social-first preview, a phone may produce a publishable result faster than a full camera kit. It's less suitable when the team needs consistent perspective, extensive bracket control, interchangeable focal lengths, or detailed architectural representation.
Match the system to the assignment
| Use Case | Camera Type | Recommended Lens | Best For |
|---|---|---|---|
| High-end residential stills | Full-frame mirrorless | Wide-angle zoom around 16mm to 35mm | Controlled interiors, architectural detail, premium listings |
| Volume residential work | APS-C mirrorless | Ultra-wide APS-C zoom | Fast, repeatable coverage for agents and rental teams |
| Tight spaces | Full-frame or APS-C interchangeable-lens camera | Rectilinear ultra-wide zoom | Bathrooms, corridors, compact kitchens |
| Quick-turn listing update | Modern smartphone | Built-in wide camera | Simple spaces, previews, mobile-first delivery |
| Hybrid photo and video package | Full-frame mirrorless | Wide zoom plus a normal zoom | Stills, walkthroughs, social clips, and detail shots |
| 360° tour production | 360 camera or panoramic still workflow | Dedicated 360 capture system or panoramic setup | Navigable tours and remote property exploration |
The body should support RAW capture, exposure bracketing, a reliable level display, and video recording appropriate to the deliverable. A sturdy tripod is more valuable than a marginal resolution increase when the workflow includes HDR or panoramic work. Teams planning 360° capture should also review this guide to 360 cameras for real estate, especially when deciding between dedicated 360 hardware and a stitched panoramic approach.
For agents deciding whether professional images are worth prioritizing, practical staging and presentation advice such as these ways to boost home appeal with images can help connect equipment choices to the listing's broader marketing objective. The camera is only one part of that result.
Mastering HDR Bracketing and Panorama Capture Techniques
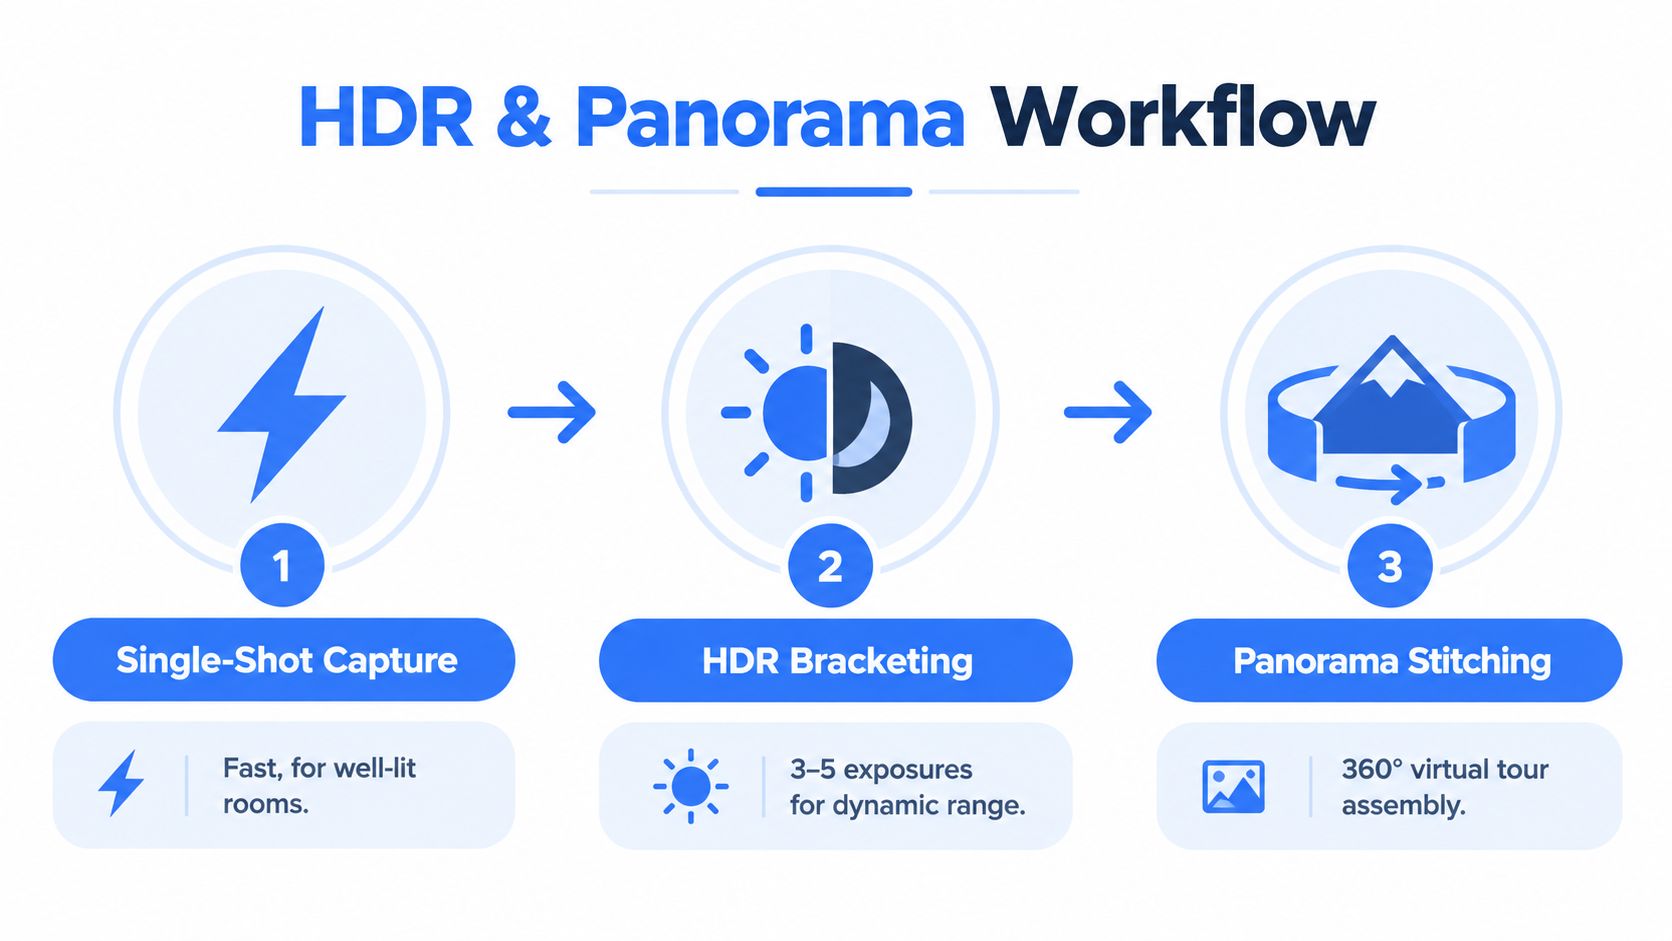
A dependable interior workflow starts by choosing the simplest capture method that can handle the room. Single-shot capture is efficient when the light is balanced and the camera can record window detail and interior shadow without compromise. HDR bracketing becomes necessary when bright glazing and darker furnishings exceed the range of one exposure. Panoramic capture serves a different purpose, creating an immersive scene rather than a conventional listing frame.
Three capture modes for three conditions
Single-shot capture works for evenly lit rooms, bright exteriors, and scenes where movement makes multiple exposures risky. The camera stays on a tripod when accuracy matters, but the photographer doesn't need to create a bracket if one RAW file contains the necessary tonal information.
HDR bracketing requires a fixed camera position. A practical workflow uses aperture priority or manual exposure, keeps aperture and ISO fixed, and changes shutter speed across the bracket. Expert guidance commonly recommends spacing exposures at about 2 EV, with 3 frames for most rooms and 5 frames for scenes with stronger window contrast. 7-frame brackets are better reserved for extreme conditions because additional exposures increase the chance of ghosting from curtains, fans, or people moving through the frame. These settings are outlined in this HDR real estate photography workflow guide.
Set the aperture for sufficient depth of field, keep ISO as low as practical, and use a timer or remote release. The important consistency is not a particular camera brand. It's preserving the same focus, framing, and aperture through every exposure.
Building a clean 360° source image
A 360° panorama needs more than a very wide lens. The camera should be level, the tripod should be stable, and the rotation should produce consistent overlap between adjacent frames. A panoramic head helps keep the camera near the lens's nodal point, reducing parallax between nearby furniture and distant walls. Without that alignment, stitching software may struggle where table edges, door frames, and chairs overlap.
The photographer should keep the tripod away from walls and major furniture whenever possible, then make a complete rotation with enough overlap for the stitching software to identify matching detail. Exposure and white balance should remain consistent around the room. A bright window, dark television screen, or reflective cabinet can expose differences between frames, so manual settings are preferable when the lighting changes around the rotation.
A walkthrough requires a separate capture mindset. The operator should move slowly, keep the camera height consistent, avoid abrupt turns, and record a route that follows the property's natural circulation. Still photographs explain individual rooms. A walkthrough explains sequence and atmosphere. A 360° tour lets viewers choose where to look, so the three formats complement rather than replace one another.
The fastest publishable package is planned before capture begins. The photographer identifies hero stills, tour viewpoints, and walkthrough routes during the initial property walkthrough, then avoids duplicating effort.
Lighting Techniques and Tripod Positioning for Every Room
Good lighting in real estate photography rarely means making every room bright. It means controlling contrast, preserving the view through windows, and keeping color consistent enough that the property feels coherent from one image to the next. The tripod provides stability, but its position determines whether the room looks spacious, distorted, or strangely low.
In living rooms, natural light usually creates the most believable result. Window coverings should be managed to reveal a pleasant exterior view, while lamps and practical fixtures can be switched on when they contribute warmth. If the windows are much brighter than the room, bracketed exposures or a carefully placed off-camera flash can fill the interior without flattening the scene.
Room-by-room positioning
Living rooms and bedrooms usually benefit from a corner position that shows two walls and enough floor and ceiling to establish scale. The camera should remain level, with vertical lines kept straight in the viewfinder. Raising the tripod too high can make furniture look undersized, while placing it too low can overemphasize the floor.
Kitchens require more care around reflective surfaces. Stainless steel, polished stone, glass, and glossy cabinetry can reflect a flash directly into the frame. An off-camera light bounced from a neutral surface, or a natural-light HDR approach, generally looks softer than direct on-camera flash. The photographer should check cabinet lighting, appliance displays, and reflections before every exposure.
Bathrooms often demand the widest useful focal length, but the camera still needs to remain level. A slight angle can make a vanity or tub appear skewed. The tripod should be positioned where the room's geometry reads accurately, even if that means showing less of the opposite wall.
Basements often contain mixed color temperatures from windows, ceiling fixtures, and lamps. A single ambient exposure may produce gray shadows or competing color casts. Controlled supplemental light can help, but the photographer should avoid overpowering the existing fixtures and creating a visibly artificial result.
For living-room staging and light placement ideas, this resource on putting a living room in the best light offers useful context beyond camera technique. The lighting plan should support the room's actual function, not turn every space into a uniformly bright studio.
A tripod should be leveled before the composition is finalized. The photographer can then make small horizontal adjustments rather than tilting the camera upward or downward, which introduces converging verticals and forces heavier correction later. Teams that need a repeatable mounting method can use this guide on how to mount a camera on a tripod.
Exterior work benefits from timing rather than brute-force lighting. Soft directional light reveals texture and landscaping, while twilight can balance a darker sky with warm interior illumination. The exact window is brief, so interior lights, camera position, and exposure settings should be prepared before the desired ambient level arrives.
Post-Processing and Building Virtual Tours with VirtualTourEasy
Post-processing should preserve the property's appearance, not redesign it. A clean sequence starts with culling, then lens correction, exposure balancing, white-balance consistency, HDR merging where needed, and perspective correction. The photographer should inspect windows, mirrors, reflective appliances, and moving objects before exporting. A technically sharp image can still fail if the room's colors vary from frame to frame or if straight walls bow noticeably.
HDR merges need restraint. The final image should retain natural shadow depth and believable window views rather than displaying halos, excessive saturation, or uniformly bright surfaces. Lens profiles can correct distortion, while vertical and horizontal guides help keep architecture credible. After the still set is approved, files should be exported in a consistent format and naming system so the listing team can identify rooms quickly.
From stills to an interactive tour
A tour workflow can begin with dedicated 360° files, stitched panoramas, or regular listing images prepared for an immersive presentation. VirtualTourEasy supports uploaded 360 images and can also turn regular property photos into 360° scenes, which gives teams a route into immersive delivery even when a specialized 360 camera wasn't used.
The platform's visual builder lets the creator arrange scenes, add drag-and-drop navigation hotspots, label rooms, place information panels, include audio, and choose the starting view. A practical sequence follows the property's physical layout. The entry scene should orient the viewer, while hotspots should lead naturally from public areas to bedrooms, bathrooms, outdoor spaces, and key amenities.
The complete process is described in this guide to creating a 360 virtual tour. Once assembled, the tour can be shared through a short link, embedded on a website, or published through an appropriate unbranded link for listing distribution. Cinematic walkthrough exports provide a separate linear version for social media and listing pages, so one capture session can serve both interactive and passive viewers.
Make the tour useful, not merely immersive
Hotspots should answer practical questions. A kitchen information panel can identify a feature, while an audio note can explain circulation or an amenity. Custom starting views should show a strong but accurate scene. Analytics can help teams understand views, visitors, device usage, and geographic activity, while lead forms and integrations support follow-up.
The editing handoff should happen only after the visual assets have been checked as a set. If stills show one color treatment, the tour another, and the walkthrough a third, the listing feels assembled rather than planned. A unified workflow makes every format reinforce the same property story.
Troubleshooting Common Issues and Tips for Different Audiences
Most production problems have a visible symptom and a predictable cause. The fastest teams don't solve them by adding more equipment. They identify where the workflow broke, then change the capture or handoff step that created the issue.
| Symptom | Likely Cause | Practical Fix |
|---|---|---|
| Orange and blue areas in one room | Mixed light sources | Turn off unnecessary fixtures, balance the remaining sources, and correct RAW files consistently |
| Leaning walls | Camera tilted upward or downward | Level the tripod and use perspective correction only as a finishing step |
| Ghosted curtains or fans | Too many bracketed exposures or movement between frames | Use fewer frames, pause movement where possible, and mask the cleanest exposure |
| Visible panorama seams | Inconsistent overlap or parallax | Keep the camera level, rotate around the nodal point, and maintain uniform overlap |
| Slow delivery | Unstructured file handling and repeated edits | Use room-based naming, presets, batch processing, and a defined export profile |
Agents and brokerages usually need consistency more than cinematic experimentation. A shared shot list, standardized file names, and batch editing reduce review time across multiple listings. The team should reserve specialist capture for properties where the additional format supports the marketing plan, rather than adding every possible asset automatically.
Hotel marketers need a different emphasis. Rooms, lobbies, amenities, event spaces, and circulation routes should be treated as connected guest experiences. A 360° tour can clarify the relationship between a lobby and function room, while a walkthrough can establish atmosphere. The capture plan should include practical details that affect booking decisions, such as room layouts, accessibility routes, outdoor seating, and event capacity cues, without making unsupported claims about the venue.
Architects and interior designers need spatial accuracy above all. Ultra-wide distortion, dramatic lighting, and aggressive color grading can hide the design decisions that matter. Straight verticals, measured camera placement, controlled reflections, and detail frames of materials create a more useful record of the project.
Mobile capture makes sense for quick updates, internal documentation, and simple web-first listings. It becomes less appropriate when the client needs repeatable camera height, consistent panoramic geometry, extensive tonal control, or a polished hybrid package. The decision should be based on output requirements, not status.
Scaling starts when the team documents the workflow. Define the minimum still set, the panoramic method, the walkthrough route, the editing standard, the approval process, and the delivery destinations. Then test the process on different property types and refine the steps that cause delays.
Virtual Tour Easy offers an AI-powered way to create immersive property tours from uploaded 360° images, regular listing photos, or generated panoramic scenes, then add hotspots, labels, information panels, audio, sharing links, embeds, and cinematic walkthrough exports. Visit Virtual Tour Easy to turn a camera real estate photography workflow into a more complete, publishable visual package.