You've just rendered a virtual tour that looked sharp in the editor. On a phone, the same walkthrough appears soft, the camera movement stutters, or the listing platform rejects the file before a prospective buyer sees the kitchen. That export failure usually isn't caused by the tour itself. It's caused by a mismatch between the footage, the delivery device, the host's limits, and the selected video quality settings.
A virtual tour has more demanding imagery than a typical talking-head clip. Slow pans expose compression in brickwork, cabinetry, foliage, fabric, and window views. A default preset designed for generic screen recording may starve the file of bitrate, reduce the resolution too aggressively, or choose a codec that the viewer's device handles poorly. The result is a weaker first impression for a property listing, hotel booking page, architectural presentation, or event venue.
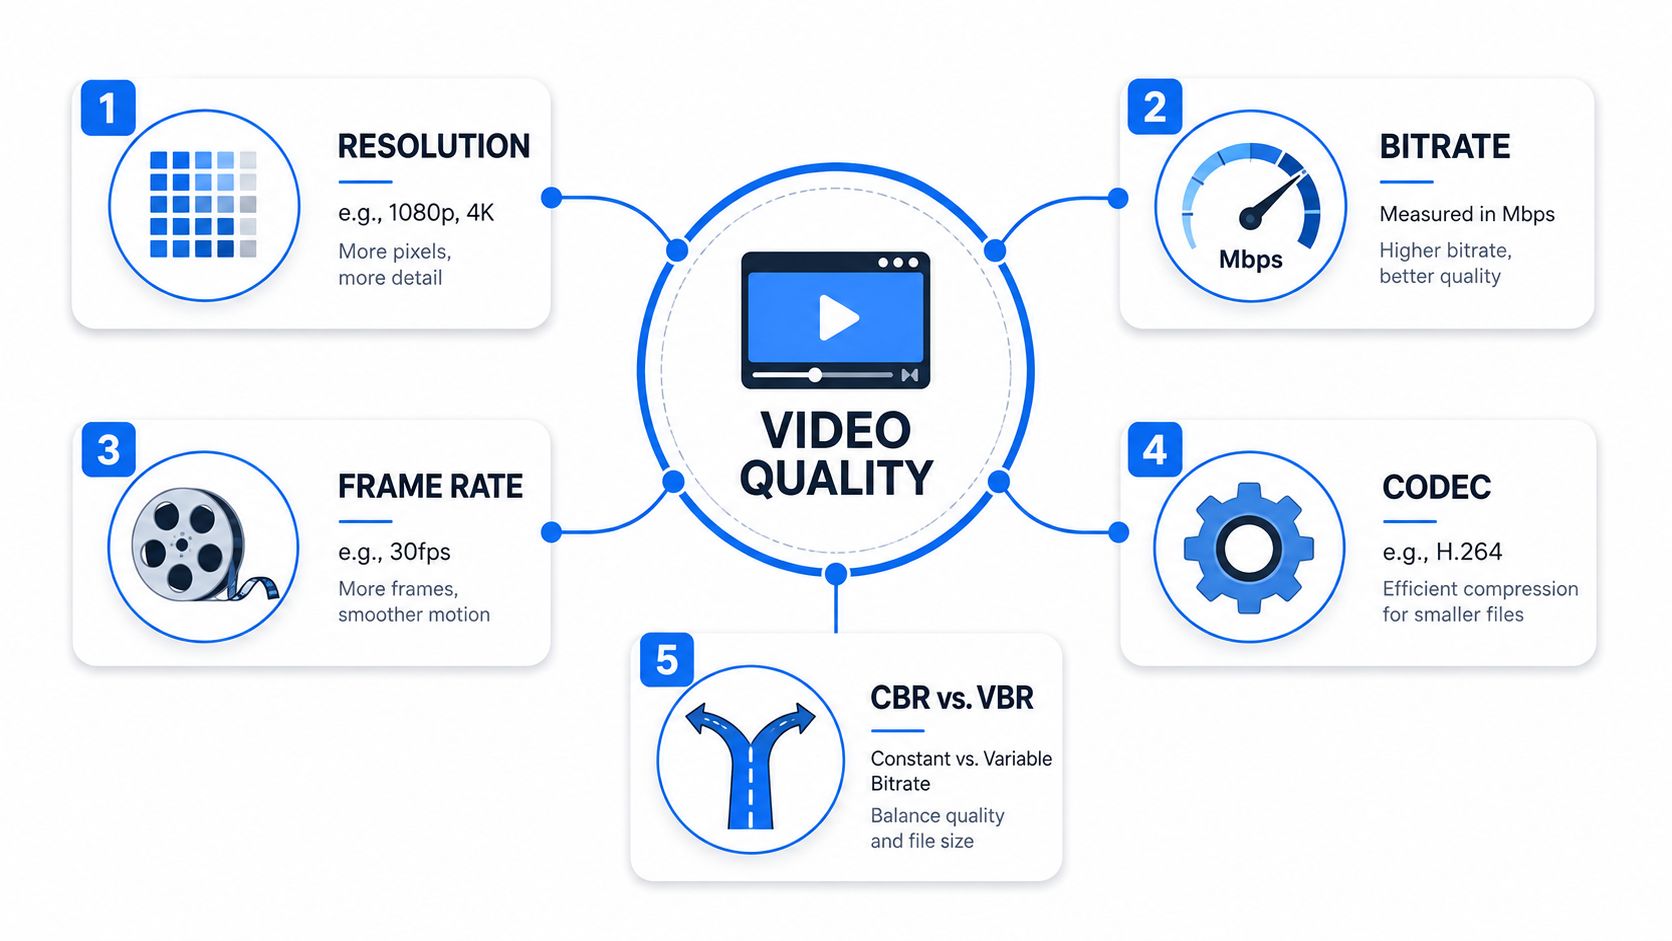
Four controls solve most export problems: resolution, bitrate, frame rate, and codec. Constant versus variable bitrate also matters when file size and playback behavior have strict requirements. The practical answer isn't always “choose the highest setting.” It's to select the strongest combination the target viewer, host, and network can support.
Table of Contents
- Why Your Tour Video Looks Worse Than Your Tour
- The Core Video Quality Settings You Are Changing
- Preset Recommendations by Use Case and Device
- Configuring Video Quality Settings Inside VirtualTourEasy
- File Size vs Quality Tradeoffs You Can Plan Around
- When 1080p Beats 4K for Virtual Tours
- Troubleshooting Export Problems and Final Tips
Why Your Tour Video Looks Worse Than Your Tour
A tour can look pristine while being edited because the software is displaying a high-quality preview, proxy, or original panorama. The exported file is a separate compression decision. If the export preset reduces dimensions or bitrate, the final video may lose the fine lines that made the room feel realistic in the editor.
360 walkthrough footage is especially unforgiving. A slow camera move across a furnished apartment contains large areas of subtle texture and many straight architectural lines. Compression has to preserve all of that while also handling reframing, transitions, and motion. Automatic compression often favors a smaller file over clean detail, which is sensible for general playback but not always suitable for a property showcase.
The four checks that matter first
Before changing every option in the export panel, inspect these in order:
- Resolution: Confirm that the output dimensions suit the destination and the original footage. Downconversion can erase detail that was present in the camera file.
- Bitrate: Check whether automatic compression has allocated enough data to moving scenes and detailed surfaces. A static lobby can survive less bitrate than a walking tour through a richly furnished suite.
- Frame rate: Keep the export aligned with the source whenever possible. An inconsistent frame rate can create uneven motion or synchronization problems.
- Codec: H.264 remains the safest compatibility choice, while H.265 and newer codecs can reduce file size when the host and viewer hardware support them.
Practical rule: A sharp tour delivered reliably is more valuable than a technically larger file that loads slowly, fails to upload, or forces the viewer to watch a blurry transcode.
The commercial stakes are direct. A buyer may leave a listing after a poor preview. A hotel guest may never reach the booking page after a slow load. An architect may lose confidence in a presentation that makes precise finishes look muddy. The right preset starts with the viewing context, not the maximum number in the menu.
The Core Video Quality Settings You Are Changing
An export panel offers several controls, and each one answers a different production question. Resolution sets the pixel dimensions used to describe the scene. A flat 1080p walkthrough and a 360 equirectangular file distribute those pixels differently, so inspect the panorama source before choosing the output. 720p, 1080p, 1440p, and 2160p, commonly called 4K, represent increasing delivery demands. A larger number does not guarantee a better tour if the source or viewing device cannot support it.
Bitrate controls how much data the encoder can use over time. A quiet hallway with plain walls compresses more easily than a slow pan across a stone façade, patterned carpet, or leafy courtyard. Too little bitrate produces blockiness, smeared textures, banding, and unstable detail. For quality-based encoding, use a lower RF value when preserving detail matters more, and a higher value when reducing file size matters more. The appropriate range depends on the output resolution and the amount of texture and motion in the tour.
How the export controls behave
Frame rate describes how many frames appear each second. A cinematic 24 fps look can suit a composed architecture film, while 30 fps is generally safer for real estate and hospitality walkthroughs because movement remains natural on common screens. Use 60 fps when the source includes active tracking, quick movement, or an intentional slow-motion treatment. Exporting at a higher rate cannot create genuine smoothness when the camera recorded at a lower rate.
Codec determines compression efficiency and playback compatibility. H.264 is the safest handoff for clients and listing portals. H.265, also called HEVC, can deliver comparable perceived quality in a smaller file, but older browsers, players, and systems may struggle to decode it. VP9 can suit web delivery when the host supports it.
CBR, or constant bitrate, keeps data allocation predictable. VBR, or variable bitrate, assigns more data to complex scenes and less to simple ones. Most finished tours benefit from constrained VBR because it follows changing movement while keeping the file manageable. Choose CBR when predictable throughput and file size matter more than compression efficiency, such as a controlled kiosk or delivery workflow.
Preset Recommendations by Use Case and Device
A useful preset starts with the viewer and delivery chain, not the largest number in the export menu. For a real estate lead on a phone, an MLS upload limit may matter more than extra pixels. For a hotel guest browsing on a laptop, loading time competes with visual detail. A sales-center kiosk can justify a larger local file because its screen, network, and playback device are under your control.
Video Quality Presets by Delivery Channel
| Channel | Resolution | Bitrate | Codec | Frame Rate | Target Size / min |
|---|---|---|---|---|---|
| MLS or IDX listing | 1080p | 8–10 Mbps | H.264 | 30 fps | Keep below the host's limit, commonly 500 MB |
| Hotel website | 1440p | 15 Mbps | H.265 or H.264 | 30 fps | Medium to large web file |
| Hotel website with large-screen focus | 4K | 25 Mbps | H.265 | 30 fps | Large web file, use adaptive delivery |
| Social cut | 1080p vertical or square | 12 Mbps | H.264 | 30 fps | Moderate file for autoplay |
| Email or pitch deck | 720p | 4–5 Mbps | H.264 | 24 or 30 fps | Keep under the message limit |
| Sales-center kiosk | 4K master | 35–40 Mbps | H.265 or high-quality H.264 | Match source | Large local playback file |
For an MLS or IDX listing, begin with 1080p, H.264, and 30 fps. This combination is easier for portals and viewer devices to decode, while reducing the risk of a host applying another harsh compression pass. Keep the file below the host's stated limit, commonly 500 MB, and shorten the presentation before forcing quality into an oversized upload.
A hotel website can support 1440p when the page and playback system handle it well. Use 4K for a large-screen presentation only when the display, device, hosting setup, and room visuals justify the additional file weight. H.265 can reduce that weight, but H.264 remains the safer handoff when browser or player compatibility is uncertain.
Social cuts require the correct shape as much as the correct resolution. Export vertical or square 1080p for mobile autoplay, and inspect the opening seconds without sound. For an email or pitch deck, 720p is usually the more practical choice. Keep the preview small and link to the full tour when a prospect needs more detail.
A sales-center kiosk is different because local storage and playback are predictable. A 4K master at a higher bitrate can preserve fine architectural lines, cabinetry, and surface texture. Test the exact kiosk computer and display before delivering it. A large file that stutters is worse than a smaller file that plays continuously.
The viewing environment also affects presentation. A hotel or architecture team refining the screen placement and furniture around a property display can find the perfect custom TV stand, while the export preset controls the digital result.
Set the bitrate for the weakest network and playback device the viewer is likely to use, not the best connection in the production office.
For platform delivery, resolution and motion should be selected together. YouTube's recommended upload encoding settings illustrate the same trade-off: higher resolutions and higher frame rates require more data to retain detail. Treat those figures as a planning reference rather than a universal export rule. A real estate lead may leave before a heavy file loads, while a hotel guest viewing a large display may notice banding and blockiness immediately.
Configuring Video Quality Settings Inside VirtualTourEasy
The export decision starts before the render. Open the project editor and preview the tour as a viewer would, first on a phone, then at the intended hosting size. Check the aspect ratio too. A reframed walkthrough, a vertical social clip, and a full 360 presentation shouldn't inherit the same output configuration.
VirtualTourEasy supports creating tours from generated panoramas, regular photos transformed into 360 scenes, or existing 360 images. Its visual builder lets teams assemble scenes, hotspots, information panels, audio, and custom starting views before sharing or exporting. For image preparation, the platform's recommendations are covered in VirtualTourEasy's image quality settings guide.
A reliable export sequence
- Open the project editor and select the tour. Preview the scenes at the destination aspect ratio. Look closely at window frames, cabinetry, artwork, and transitions because these details reveal compression problems early.
- Open the export or video panel. Choose the walkthrough or cinematic video output rather than assuming the project's preview settings control the final file.
- Select the delivery preset. Use a balanced web preset for an MLS or hotel site, a compressed preset for a review file, and a platform preset for social media. The highest available resolution isn't automatically the correct choice.
- Set resolution first. Choose 1080p for general web delivery, 1440p or 4K when the host and viewer device justify it, and 720p for a lightweight email preview.
- Set frame rate next. Match the source. Choose 30 fps when the original footage supports it and smooth property movement matters.
- Choose the codec. Use H.264 for the broadest compatibility. Choose H.265 when the destination supports hardware decoding and file reduction is important.
- Choose bitrate control. Leave constrained VBR enabled for mixed scenes. Select CBR when predictable playback or a strict file-size target outweighs efficiency.
- Review the projected file size and host limit. Export a short test before committing to the complete walkthrough.
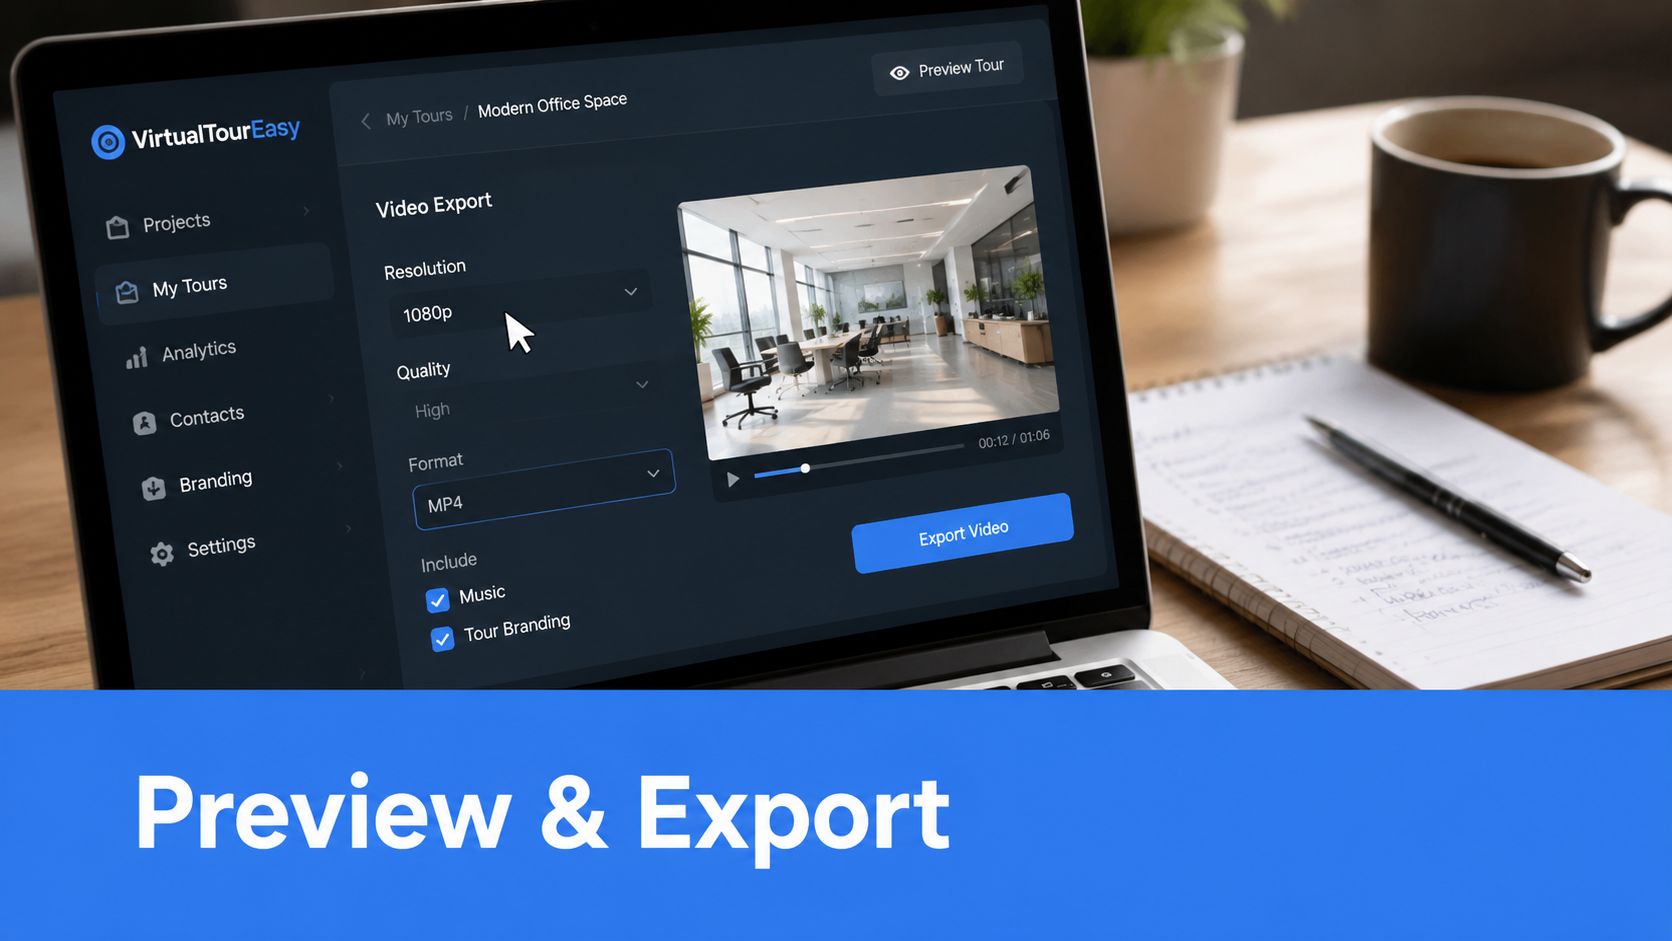
The test clip should include a transition, a slow pan across detailed materials, and a brighter window or exterior view. Open it on the actual phone, laptop, kiosk, or client player that will receive the final file. Confirm that the panorama stays sharp, movement remains even, audio stays aligned, and the platform doesn't immediately replace the file with a visibly worse transcode.
File Size vs Quality Tradeoffs You Can Plan Around
A property tour can look excellent in the edit suite and still fail at upload, playback, or email attachment. File size is a delivery constraint, not a quality score. Bitrate and duration drive it first, while resolution, frame rate, codec efficiency, scene complexity, audio, and container overhead also matter. Keep a high-resolution master for future versions, but choose a separate upload or viewing file for the actual audience.
The planning examples show why the export target matters. A two-minute 4K export at 40 Mbps occupies about 600 MB, while the same duration at 8 Mbps is roughly 120 MB before additional overhead (the stated file-size examples and encoding trade-offs). A 10-minute 1080p master at 16 Mbps produces approximately 1.2 GB, while a 4 Mbps web version is about 300 MB, using the same reference.
File Size and Quality Tradeoff Examples
| Resolution | Bitrate | Approx. File Size | Best Use |
|---|---|---|---|
| 4K | 40 Mbps | About 600 MB for two minutes | High-detail master or local presentation |
| 4K | 8 Mbps | About 120 MB for two minutes | Constrained web delivery, only after visual testing |
| 1080p | 16 Mbps | About 1.2 GB for ten minutes | High-quality master |
| 1080p | 4 Mbps | About 300 MB for ten minutes | Smaller web derivative |
Higher bitrate protects brickwork, upholstery, foliage, and moving camera shots, but the gain is uneven. One encoder comparison reported only about a 0.5% VMAF gain when moving from 5000 kbps to 8000 kbps at 1080p (the reported encoder comparison). The practical test is the exported file on the viewer's phone, laptop, listing page, or hotel display, not the bitrate number by itself.
For real estate web delivery, a polished 1080p derivative in the 8–12 Mbps range often balances clarity and transfer demands. A cinematic architecture review may justify retaining a high-bitrate 4K master. Codec choice changes the file-size calculation too. HEVC can reduce bitrate compared with H.264 at similar perceptual quality, while AV1 may reduce it further, but the result depends on the footage, encoder settings, and playback support.
Archive the master separately, remove unused audio tracks, and avoid repeated transcodes. The bandwidth-efficient virtual tour guidance helps when one Virtual Tour Easy project needs multiple web derivatives. A large rejected upload does nothing for a listing visitor. A smaller, tested export can publish promptly without sacrificing the details that sell the room.
When 1080p Beats 4K for Virtual Tours
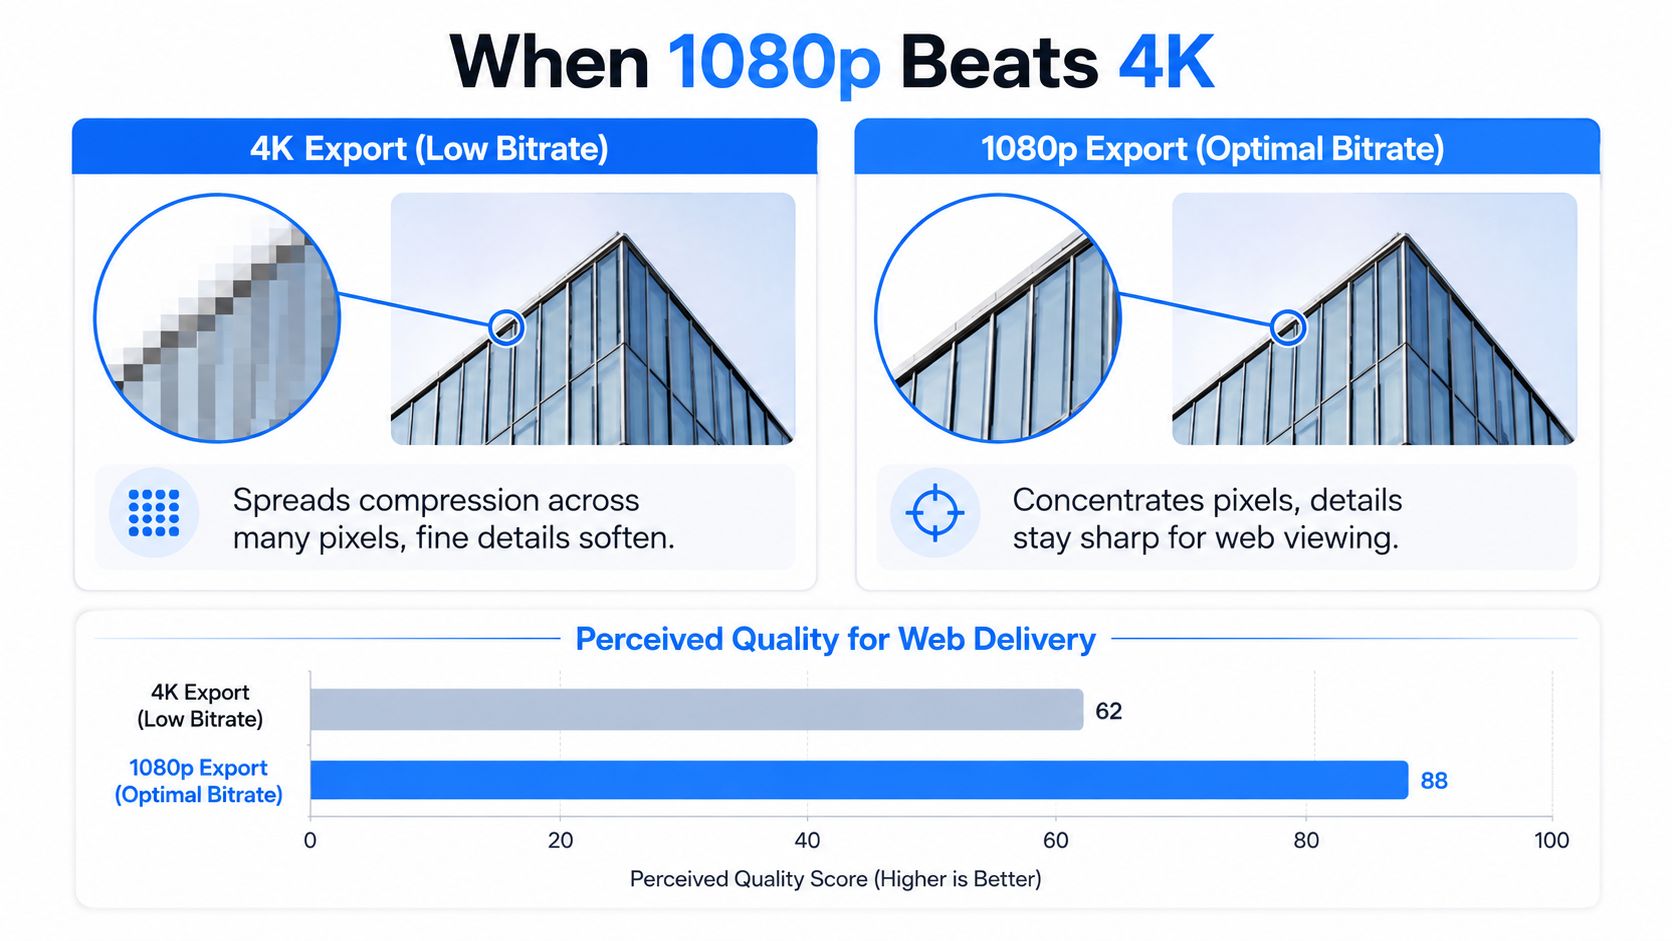
A 4K label doesn't guarantee a better viewing experience. If the bitrate is constrained, the encoder has to spread compression across many more pixels. Fine architectural lines can soften, wall gradients can band, and movement can become less stable even though the file reports a higher resolution.
That makes 1080p the stronger choice for many real estate and hospitality tours. Phones and laptops often display the smaller output effectively, and a well-allocated bitrate can keep cabinetry, stone, artwork, and furniture edges cleaner than a low-bitrate 4K export. The smaller file also has a better chance of loading reliably on a mobile connection or passing a host's upload rules.
A practical resolution decision
Choose 1080p when:
- The source is limited: A higher output cannot restore detail that the original capture didn't contain.
- The viewer is mobile-first: Reliable playback and quick loading matter more than a 4K badge.
- The host compresses aggressively: A smaller, well-encoded source may survive the platform's processing better.
- The delivery is email or MLS: Strict attachment and upload constraints favor a lighter derivative.
Choose 4K when the source contains genuine detail, the camera movement is controlled, and viewers will use a large display or local playback system. Readable artwork, architectural finishes, and carefully composed slow pans can justify the larger master. Keep the frame rate consistent with the source, whether it's 24, 25, or 30 fps, and don't invent extra frames to make the export appear more advanced.
The same principle applies to generated or enhanced footage. Teams evaluating 4K video generation for music tracks should apply the same test to tour exports: inspect actual detail at the final delivery bitrate instead of treating resolution as a standalone quality score.
A useful workflow is to archive the 4K master when storage allows, then publish a 1080p derivative if viewers can't distinguish the extra detail. If the larger file is several times heavier without improving the viewing experience, 1080p is the better product decision.
Troubleshooting Export Problems and Final Tips
Export symptoms usually point to a specific control. The fastest diagnosis starts with the visible failure, then changes one setting at a time. Re-exporting every option at once makes it impossible to know what fixed the result.
Match the symptom to the setting
- Banding in skies, walls, or smooth gradients: The bitrate may be too low for the selected resolution. Raise the bitrate, test constrained VBR, or use CBR when predictable allocation matters.
- Soft brickwork and smeared furniture: The output may be over-compressed or enlarged beyond the source's useful detail. Lower the resolution or raise the bitrate before changing frame rate.
- Audio drift in long scenes: A variable frame rate source can cause timing problems. Conform the source to constant frame rate, or export at a consistent frame rate such as 30 fps.
- Slow playback on mobile hotspots: A 4K master may be served without an effective mobile derivative. Create a 1080p mobile version at 6 Mbps as the troubleshooting target specified for this workflow.
- Rejected MLS upload: The file may exceed the platform's 500 MB cap. Use the MLS preset instead of the cinematic preset and confirm the projected size before rendering.
A full guide to the broader capture and export process is available in VirtualTourEasy's 360 video tutorial. It's especially useful when a problem begins before the export panel, such as uneven source footage, poor stitching, or an unsuitable aspect ratio.
Three safeguards for every project
- Render a three-second test clip. Include motion, a transition, and a detailed surface. Review it on the actual target device.
- Archive the master separately. Keep the high-quality source or master away from web derivatives so future exports don't start from an already compressed file.
- Check codec compatibility at handoff. A client using an older media player may need H.264 even when H.265 produces a smaller file.
The strongest preset is the one that preserves the details that sell the space while removing the friction that stops people from viewing it. Resolution, bitrate, frame rate, and codec should be selected as a delivery system, not as isolated quality badges.
Virtual Tour Easy lets teams create immersive tours from panoramas, regular photos, or existing 360 images, then assemble scenes with hotspots, information panels, audio, and custom starting views. Visit Virtual Tour Easy to build a tour, test its video export on real viewer devices, and prepare platform-specific versions before sending the next property, hotel, or architecture presentation live.