A measurable U.S. industry generated about $268.3 million in revenue in 2024, with roughly 6,891 businesses and 6,181 employees, yet industry revenue grew only about 0.6% annually over the previous five years. At the same time, the number of businesses grew at a 12.6% CAGR from 2019 to 2024 (IBISWorld's real estate photography industry analysis). That contrast explains what becoming a real estate photographer involves. There's room to enter, but the opportunity belongs to photographers who build an efficient local service business, not those who buy an expensive camera.
Professional imagery is now part of the listing product. Listings with professional photography are commonly reported to sell about 32% faster, while 89% of buyers say professional photos are important and about 85% consider photos the most important feature on a real estate website (industry statistics compiled by EditorFriend). The camera matters, but reliability, composition, editing speed, pricing, client acquisition, and delivery systems pay the bills.
Table of Contents
- How the Real Estate Photography Market Looks in 2026
- Core Skills and the Starter Gear Kit
- Shooting on Site Like a Pro
- Editing and Building Virtual Tours
- Pricing, Packages, and Contracts
- Finding Clients and Marketing Yourself
- Scaling to a Full-Time Real Estate Photography Business
How the Real Estate Photography Market Looks in 2026
The market is fragmented by design. Independent photographers, small studios, regional vendors, brokerage partners, property managers, and specialists compete for individual listings instead of a small pool of conventional photography jobs. That creates several entry points, while making client development part of the work after the first booking.
Work can come from agent referrals, brokerage preferred-vendor lists, property management firms, vacation-rental hosts, builders, and companies serving multiple real estate industries. Mapping these adjacent customer groups helps you choose a niche before buying more gear. Local knowledge also carries weight. Agents need someone who can judge travel time, handle property access, meet neighborhood expectations, and deliver by the listing deadline.
The pricing below reflects verified residential ranges. Quotes still depend on location, property size, licensing, travel, deliverables, and assignment complexity.
| Service Tier | Stills Only | Stills + Drone | Full Package, Stills + Drone + 3D Tour |
|---|---|---|---|
| Standard residential | $150–$300 | Qualitative add-on | Qualitative premium package |
| Major metro baseline for homes under 3,500 sq ft | $250–$500 | Qualitative add-on | Qualitative premium package |
| Luxury or bundled assignment | $500–$1,500+ | Qualitative add-on | Qualitative premium package |
Independent pricing guidance provides these ranges for real estate photography. They are not a universal rate card. A small-market photographer may charge less for a simpler shoot, while a specialist working with luxury homes, acreage, vacation rentals, or complex tours can support a broader package.
The practical conclusion is clear: competing only on price is a weak entry strategy. A stronger offer promises a defined result, such as consistent listing-ready stills, reliable next-day delivery, or a complete package with an immersive tour. These promises also make your workflow easier to sell and repeat.
Use Virtual Tour Easy's realty photography benchmark guide to compare deliverables and workflow expectations. The camera is only one part of the service. Packaging, editing speed, access coordination, and dependable delivery determine whether a booking becomes repeat business.
Core Skills and the Starter Gear Kit
The camera is the smallest part of the job. A starter kit must show rooms accurately, control contrast, keep lines straight, and produce files you can deliver repeatedly. A full-frame or APS-C body with good dynamic range is enough. The lens usually affects results more because interiors need a wide view without making walls and furniture look distorted.
A 16–35mm wide-angle lens is a practical full-frame workhorse, with 24mm providing a dependable middle ground. Extremely wide settings can make compact rooms look misleadingly large. Accurate representation matters more than fitting every corner into one frame.
Build around stability and light
Buy a sturdy tripod with a leveling head before a premium camera body. It supports longer exposures, consistent framing, and bracketed captures. Add a TTL speedlight or off-camera flash for window pulls and dark interiors, plus an intervalometer or camera-based AEB bracketing for HDR sequences.
A capable default kit might include a Sony a7C II, Tamron 17–28mm lens, Manfrotto 055 tripod, and Godox AD200. That combination is convenient and flexible, not mandatory. Choose equipment around the properties you shoot and the services clients will book.
A lower-cost setup can use a used Canon 6D, Samyang 14mm manual-focus lens, a tripod costing about $150, and a flash costing about $90. Verified starter-gear guidance indicates that this type of setup can produce MLS-acceptable images for under $1,200, while the more capable setup generally falls around $2,500–$3,500 (starter gear and workflow guidance). Used equipment or short-term rental protects cash flow while you learn which focal lengths, lighting methods, and deliverables clients request.
Practice the skills clients notice
The technical checklist is short, but every item affects revisions:
- Dynamic range: Preserve window detail while retaining shadow information.
- Leveling: Keep verticals and horizontals controlled so rooms do not look tilted.
- Flash control: Use bounced or off-camera light instead of harsh direct flash.
- RAW capture: Keep flexibility for white balance, exposure, and color correction.
- Operational speed: Organize cards, batteries, folders, and backups before the first booking.
Drone work adds separate responsibilities. Anyone offering aerial photography must understand local aviation rules, insurance, airspace, and safe operating procedures. Readers exploring formal RPAS education can review the Ace Aviation Aerospace Academy RPAS training. For equipment choices and practical capture habits, consult this realty photography tips guide. These skills and tools support a sellable service, but reliable preparation and delivery are what turn a shoot into repeat work.
Shooting on Site Like a Pro
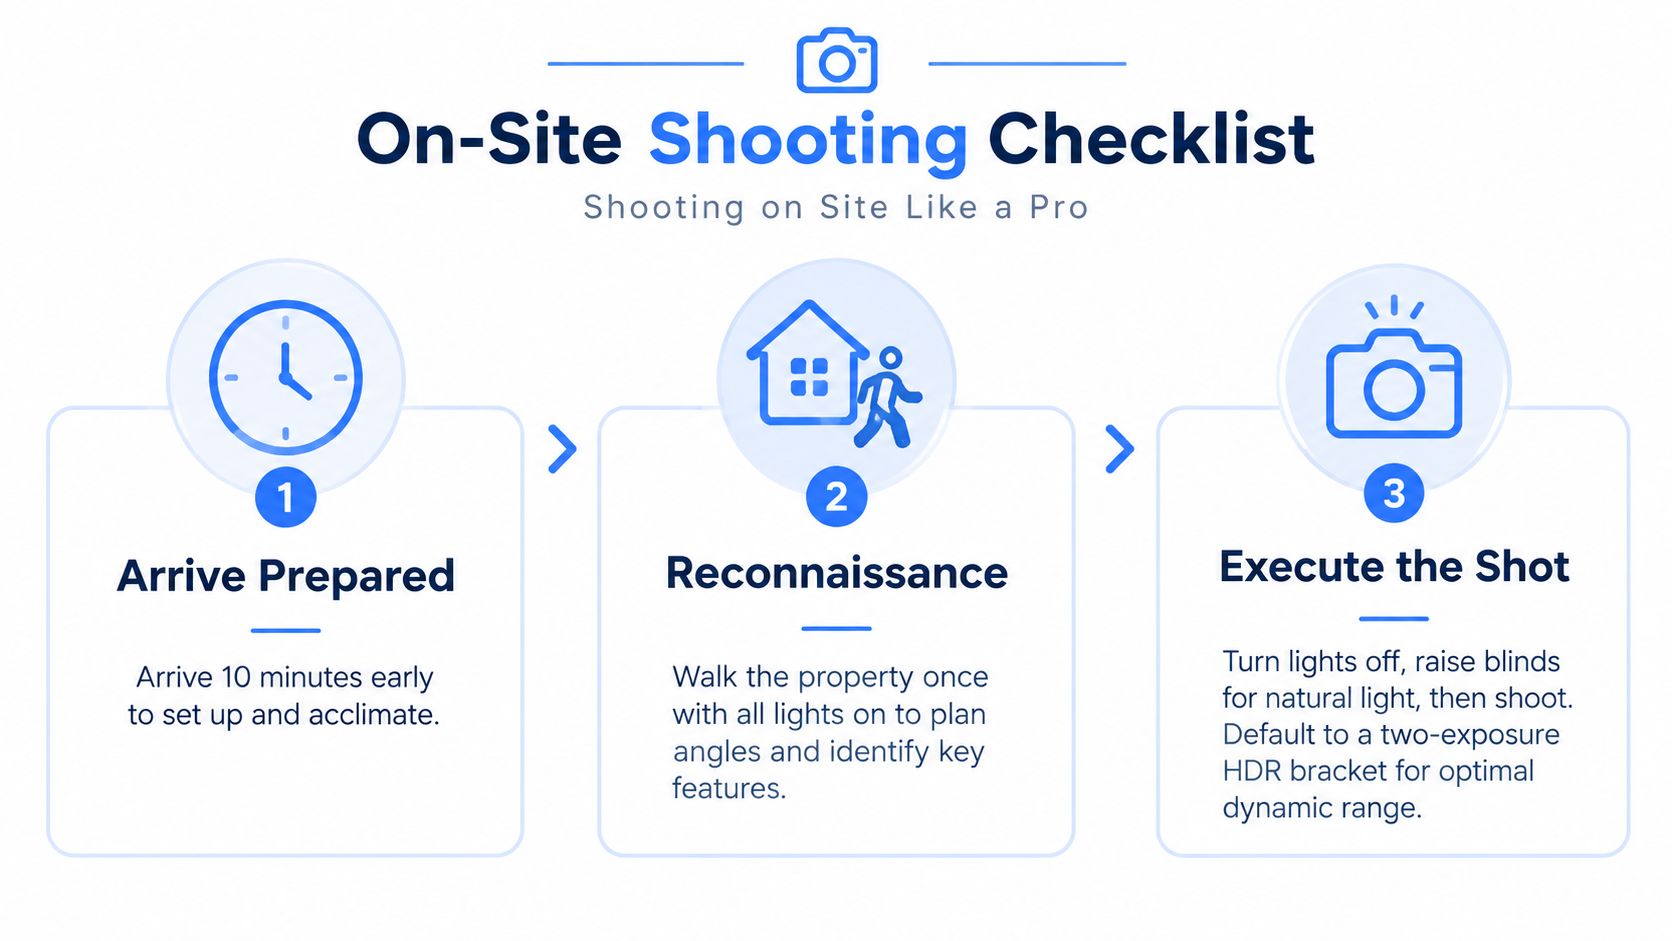
A professional shoot starts with the property, not the camera. Arrive 10 minutes early to park, unload, confirm access, and check whether the home is ready. Walk through every room with the lights on. Note the strongest angles, window direction, reflective surfaces, clutter, and spaces that need a quick adjustment.
Raise blinds where they improve the view, then decide which lights should stay off. Natural light often gives the listing a consistent appearance, while controlled flash can restore shape in rooms with difficult contrast. Moving a bin, straightening chairs, or clearing a counter can improve the final gallery more than another accessory.
Use a repeatable capture sequence
A practical default is a three-frame HDR bracket at -2, 0, and +2 EV for exteriors and interiors with difficult window contrast. For scenes with more severe contrast, use 3–5 exposures, such as -4/-2/0/+2/+4, so the blend retains window highlights and interior shadows. The tripod must remain fixed throughout the sequence. The HDR capture guidance provides further workflow detail.
Composition should feel deliberate rather than wide:
- Chest-height camera position: Work from doorways or corners without lowering the camera toward knee level.
- Leading lines: Use hallways, counters, flooring, and staircases to guide attention through the frame.
- Room coverage: Capture a wide view, a mid-range view, and a detail for each important room.
- Level camera: Use a hot-shoe bubble level or digital level to keep verticals from converging.
- Color control: Set a custom white balance when incandescent and daylight sources create uneven color.
Practical rule: A blown window, leaning wall, or cluttered countertop usually reflects a decision made before editing.
Agents commonly need a strong front exterior, a kitchen view toward the window, the primary bedroom, and at least one lifestyle detail. Twilight images can add variety, but the usable light changes quickly, so prepare the composition and exposure plan in advance. Deliver a gallery that supports the property's story and the agent's marketing plan, rather than filling an arbitrary image quota.
Editing and Building Virtual Tours
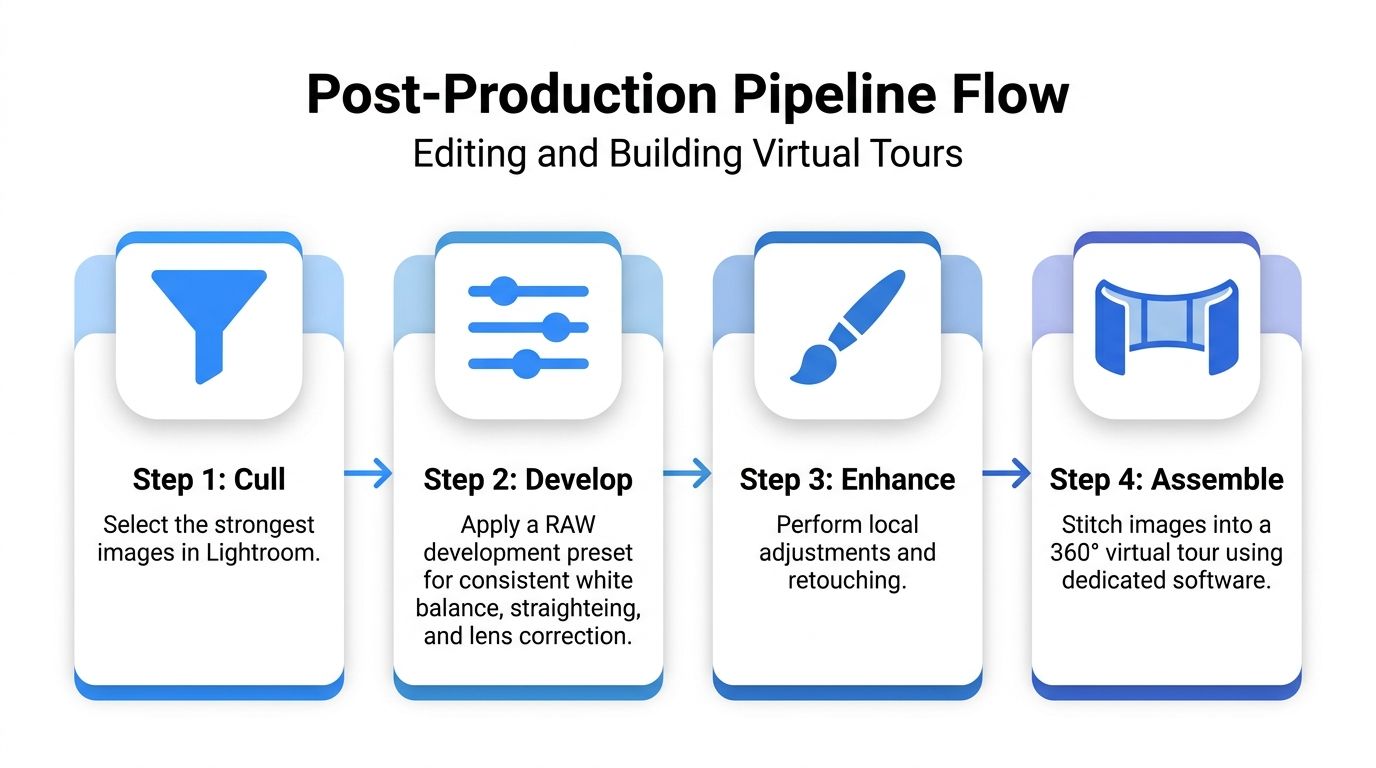
A dependable editing pipeline starts with file discipline. After copying the RAW files into a job folder, the photographer should cull aggressively in Lightroom, remove duplicates and weak compositions, and keep the strongest image for each required viewpoint. Consistency matters more than novelty because an agent needs a complete, coherent listing gallery.
RAW development should begin with a repeatable preset for white balance, lens correction, and basic straightening. HDR blends can then address windows and shadows through Lightroom HDR Merge, Photomatix, or Aurora HDR. Photoshop remains useful for precise work, including sky replacements, TV-screen changes, cord removal, and small distractions that an automated tool can't handle cleanly.
Combine automation with judgment
AI-assisted editing is already common in the profession. Verified industry coverage reports that 71% of photographers use AI-assisted editing for tasks such as HDR blends, vertical correction, sky replacement, and clutter removal, while other 2025 summaries place adoption above 72% (AI and real estate imagery coverage). That doesn't mean every edit should be automated.
AI can speed up masking, lawn changes, object removal, and initial blending. Manual review is still necessary when a replacement sky changes the character of the property, furniture removal leaves artifacts, reflections look unnatural, or an HDR merge creates halos. Premium pricing requires quality control, not just faster exporting. A focused workflow for AI real estate photo editing can help define which tasks belong in automation and which require human inspection.
For delivery, prepare MLS-friendly stills, a branded or unbranded slideshow where appropriate, and an immersive tour when the client orders one. A 360 workflow requires consistent source frames, careful stitching, clear room labels, and a useful starting view. The finished tour should work as both an MLS embed and a standalone link so agents can share it in listing pages, email, and social posts.
VirtualTourEasy can fit into that delivery layer as one option for creating tours from existing 360 images or regular property photos, then arranging scenes, hotspots, labels, and shareable links in a visual builder. The photographer still needs to capture representative images and check the final navigation. Software can assemble the experience, but it can't decide whether the tour presents the property accurately.
Pricing, Packages, and Contracts
Price the assignment around its total labor, not only the minutes spent inside the property. Travel, preparation, capture, file handling, editing, revisions, delivery, equipment depreciation, insurance, and taxes all reduce the margin. A camera-time quote may look competitive while leaving no room for the work around the shoot.
Use a tiered structure instead of one universal rate. Standard packages commonly fall around $150–$300. Homes under 3,500 square feet in major U.S. metros may support a baseline of $250–$500, while luxury or bundled assignments can reach $500–$1,500+, according to independent real estate photography pricing guidance. Treat these figures as reference points, then adjust for travel, scope, local demand, and turnaround.
Make the offer easy to buy
A package should state the property size covered, delivery window, and number or type of final images. Keep add-ons easy to understand:
- Extra property size: Quote additional coverage when the home exceeds the base scope.
- Twilight exterior: Reserve a separate lighting window and protect that calendar time.
- Drone imagery: Offer it only with the required qualifications and insurance.
- Video walkthrough: Price planning, capture, editing, music, and delivery separately.
- Floor plan: Treat measurement and drafting as a distinct service.
- Virtual tour: Charge for capture, stitching, assembly, hosting, and support.
A virtual tour can raise package value without requiring as much additional on-site time as another full photography session. Its price still needs to cover software, editing, testing, and client communication. Make every inclusion visible in the estimate. Photography estimate templates from AurenWell can help organize professional quotes.
Contracts keep small misunderstandings from becoming unpaid work. Specify the turnaround promise, reshoot terms for agent-requested restaging, image usage rights, payment timing, late-payment terms, and cancellation fees for short-notice cancellations. Also state what happens if the property is not ready, access fails, weather disrupts aerial work, or the client requests edits outside the original scope. Clear terms protect the schedule and make the service easier to sell.
Finding Clients and Marketing Yourself
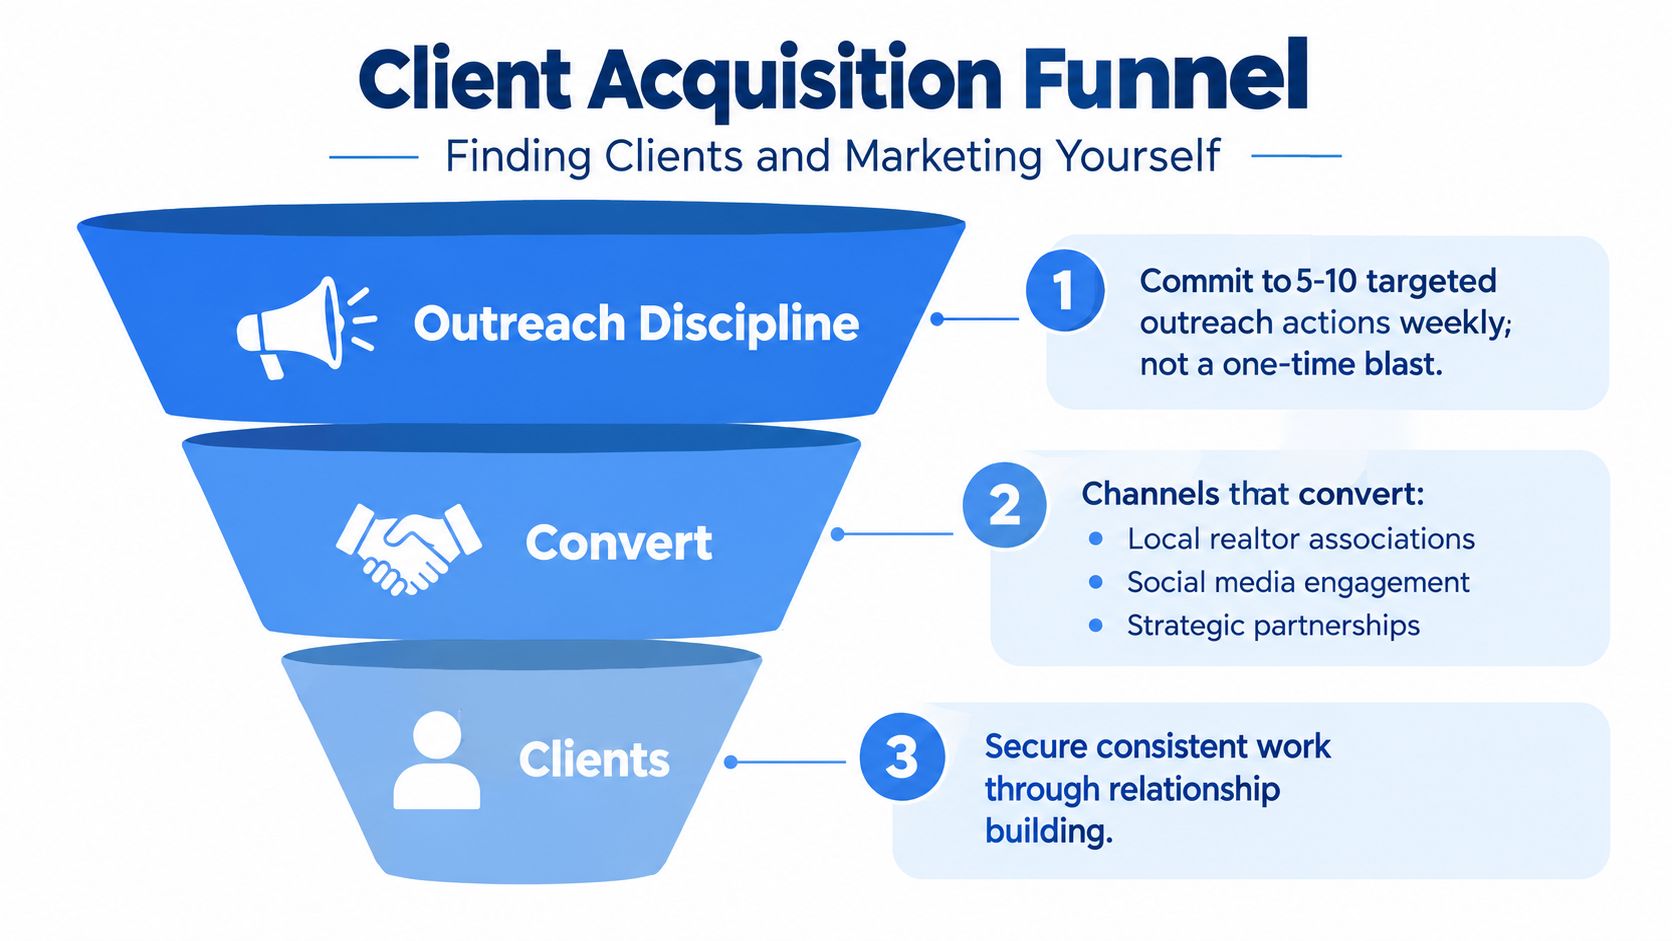
Client acquisition works better as a weekly operating habit than as a one-time portfolio launch. A new photographer should commit to 5–10 targeted outreach actions each week, then track what happens. That could include an email, a referral request, a brokerage introduction, a follow-up call, or a useful comment on an agent's active listing.
The strongest outreach leads with the agent's operational problem. A short email can offer a sample edit from a current listing, explain the delivery window, and show how stills, aerial content, or tours will arrive in an organized folder. Camera specifications belong near the bottom, if they appear at all.
Choose channels that create conversations
Several low-cost methods can work when the message is specific:
- Active-listing outreach: Send a concise note with one useful sample edit and a clear service offer.
- Brokerage visits: Ask whether the office accepts short educational presentations for agents.
- Open-house networking: Bring a tablet showing finished galleries and tours, not just camera gear.
- Partner referrals: Build relationships with one stager, inspector, contractor, or property manager.
- Local visibility: Maintain a single-page website, a complete Google Business Profile, and an Instagram portfolio focused on properties.
A prospect list can be built from public listing information and local brokerage pages, then filtered by neighborhood, property type, listing activity, and visual quality. The pitch should stay short, around the length of a brief email, and emphasize predictable delivery, clear packages, and a service area.
A portfolio earns the conversation. A reliable process earns the second booking.
Weekly tracking should include pitches sent, replies, consultations, bookings, repeat clients, and referrals. Those measures show whether the problem is weak targeting, an unclear offer, poor follow-up, or inconsistent delivery. The goal isn't to collect followers. It's to create a dependable path from local contact to paid assignment and then to repeat work.
Scaling to a Full-Time Real Estate Photography Business
Scaling begins with evidence, not excitement. The first phase should close portfolio gaps, define packages, test delivery times, and identify which property types produce the best work. A photographer who wants to learn how to become a real estate photographer sustainably should treat the first 90 days as an operating experiment, not a race to buy every accessory.
The roadmap can follow three phases:
- Weeks 1–4, foundation: Photograph missing portfolio categories, finalize the base package, document the shot list, create a booking form, and prepare a contract. The photographer should also practice the complete workflow from card import through delivery.
- Weeks 5–8, first clients: Focus on securing the first three paying clients, requesting permission to use finished work, collecting testimonials, and correcting workflow bottlenecks. Add one carefully chosen upsell, such as a virtual tour or aerial service, instead of presenting an overwhelming menu.
- Weeks 9–12, systems and growth: Introduce scheduling software, reusable editing presets, standardized folders, automated invoices, and a follow-up sequence. Begin approaching brokerages and property managers with a recurring service proposal rather than waiting for individual referrals.
The business becomes more resilient when one shoot can create more than one revenue stream. Still photography remains the base product, while video walkthroughs, aerial work, 3D tours, and floor plans create additional ways to serve a listing. Recent order data shows how fragmented adoption remains: 16.4% of 2025 orders included video walkthroughs, 14.2% included aerial photo or video, 11.0% included 3D tours, and 4.3% included floor plans (HomeJab's 2025 real estate photography trends). Those figures suggest opportunity, but they don't justify buying every tool before demand is proven.
A subcontract editor becomes sensible when editing delays start limiting bookings or damaging the promised turnaround. A second camera body is justified when equipment failure would cancel paid work. A scheduler or part-time shooter becomes useful when the owner is spending more time coordinating than capturing or selling. The move from solo operator to bookable brand should happen when repeat demand, documented standards, and cash reserves support it, not merely because the business has had a busy week.
The safest transition away from a day job comes after the photography business has demonstrated consistent monthly income that covers personal expenses, operating costs, taxes, and a reserve. That threshold is personal and should be calculated from actual invoices, not an invented industry benchmark.
Virtual Tour Easy gives real estate photographers a way to turn regular property photos or existing 360 imagery into shareable immersive tours, with scenes, hotspots, labels, embeds, and standalone links managed in one visual workflow. Photographers building a differentiated listing package can visit Virtual Tour Easy to explore how virtual tours can complement still photography and create an additional client deliverable.