Netlify handles custom-domain SSL automatically through Let's Encrypt once DNS points correctly to Netlify, so site owners generally don't need to buy, upload, or replace certificates manually. For a bare domain, the expected A-record target is 75.2.60.5, while a www record should point by CNAME to the site's *.netlify.app hostname.
A familiar launch-day problem follows a different pattern. The site is deployed, the custom domain has been entered in Netlify, and the page still produces an SSL warning or refuses to load securely. The application may be working perfectly. In many cases, the certificate failure stems from a DNS issue, an authoritative nameserver conflict, or a restrictive CAA record.
The reliable way to handle Netlify custom domain SSL is to treat certificate issuance as a validation sequence. Add the domain in Netlify, configure the authoritative DNS provider, allow propagation, verify each customer-facing hostname, and only then diagnose certificate status. That order prevents most avoidable failures.
Table of Contents
- Why Automated SSL Changes Everything
- Configuring Your Domain in Netlify
- Understanding the Certificate Lifecycle
- Essential DNS Record Configurations
- Troubleshooting SSL and DNS Failures
- Validating Before You Go Live
Why Automated SSL Changes Everything
A branded domain can appear ready while the browser still shows a certificate error. The site files are live on Netlify, the preview works, and the marketing team has already prepared the launch link. Yet the production domain may still resolve to an old host or a parking service, leaving Let's Encrypt unable to confirm that Netlify controls the requested hostname.
Netlify's model removes much of the traditional certificate administration. When a custom domain is added, Netlify attempts to provision a certificate through Let's Encrypt. Once DNS validation succeeds, the certificate is generated and renewed automatically, so the site owner generally doesn't need to purchase, upload, or manually replace an X.509 certificate. The platform also supports domain aliases when their DNS records are valid and those aliases can be included in the site's SSL certificate.

The operational shift
Traditional hosting often made certificate ownership a recurring administrative task. Someone had to select a certificate, install it on the server, monitor its validity, and replace it before expiration. Netlify shifts that work into an automated lifecycle, which is especially useful for agencies and businesses managing multiple branded domains.
That doesn't mean SSL is independent of DNS. Netlify can automate certificate provisioning only after the domain resolves to Netlify's infrastructure. A domain entered in the dashboard is not proof that public DNS has been updated. The authoritative DNS provider remains the source that certificate authorities consult during validation.
Practical rule: Treat DNS ownership and certificate issuance as separate checkpoints. A successful Netlify deployment doesn't prove that the production domain is ready for HTTPS.
The same principle applies beyond Netlify. Teams comparing certificate workflows can review this guide to SSL certificate auto-renewal for broader context on why automated renewal reduces operational risk. The useful lesson is simple: automation works best when the records that identify the correct host are stable, visible, and free from conflicts.
Configuring Your Domain in Netlify
The safest production workflow starts in Netlify and finishes at the authoritative DNS provider. Adding a domain in Netlify tells the platform which hostname should serve the site. Updating DNS then proves that public requests for that hostname should reach Netlify.
Add the domain before changing traffic
Open the site in Netlify and go to Domain management. Add the bare domain, such as example.com, and review the resulting domain and HTTPS status. Netlify may also recognize or configure the related www hostname, but both customer-facing versions need explicit testing before launch.
This sequence is preferable to changing DNS first because it gives Netlify a known domain to validate. It also reduces confusion when several sites, environments, or aliases exist in the same account. For teams planning branded web addresses, the guidance on choosing a custom domain name provides useful naming context, but certificate readiness still depends on the DNS records themselves.
Configure the authoritative DNS provider
With external DNS, use the expected records for the standard setup:
- Apex domain: Set the A record for
example.comto75.2.60.5. - WWW hostname: Set the CNAME for
wwwto the site's*.netlify.apphostname shown by Netlify. - Remove conflicts: Check for old hosting records, competing apex records, parking targets, or proxy settings that prevent the expected destination from resolving.
- Verify publicly: Use
dig, an NS lookup, or a DNS-checking service to inspect results from more than one region.
The reason for testing both names is operational, not cosmetic. A visitor may use the apex domain while an advertisement, QR code, email campaign, or embedded link uses www. One hostname can resolve correctly while the other still points elsewhere.
Allow for propagation
Netlify states that DNS changes can take up to 48 hours to propagate. During that period, different resolvers may return different answers, especially when older cached records remain active. Launch teams should avoid switching campaign links or public traffic until both the apex and every customer-facing hostname return the expected DNS results.
A domain that works from one office network isn't necessarily ready globally. The validation target is consistent public resolution, followed by successful HTTPS responses for each hostname.
Understanding the Certificate Lifecycle
Once DNS validation succeeds, Netlify-managed Let's Encrypt certificates are provisioned and renewed automatically. The site owner's responsibility is mainly to maintain the domain configuration that allows validation to keep working. Manual certificate replacement isn't part of the normal Netlify-managed workflow.
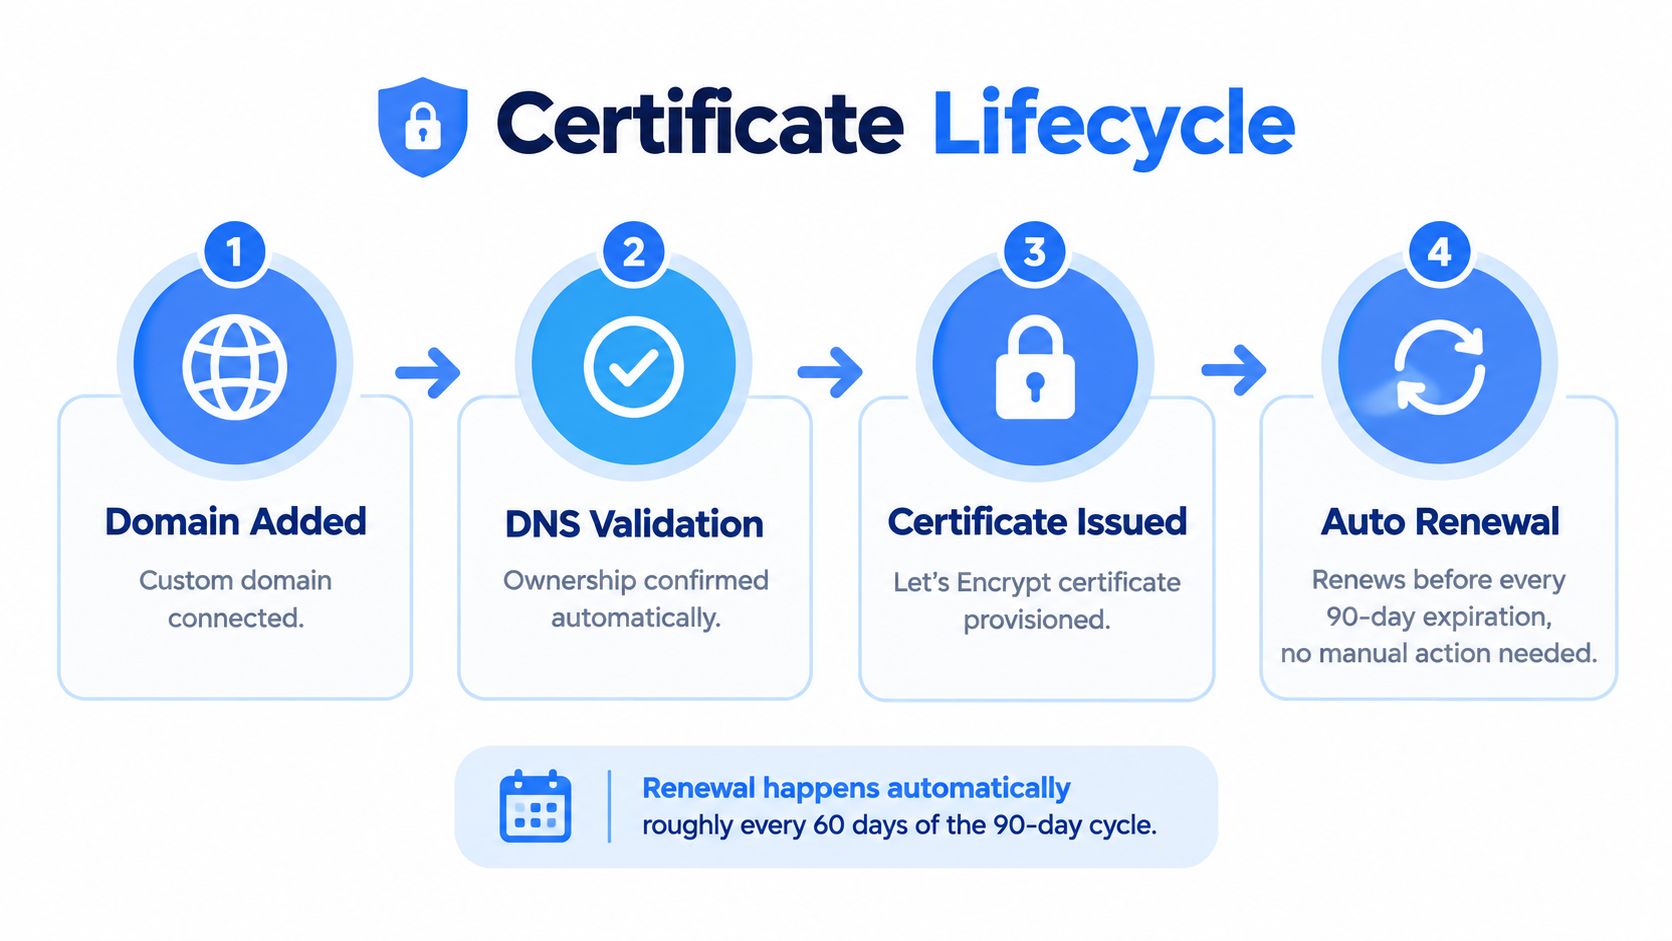
Four stages of normal operation
The lifecycle is easier to understand as a chain:
- Domain added: Netlify associates the custom hostname with the site.
- DNS validated: Public records point the hostname to Netlify's infrastructure.
- Certificate issued: Let's Encrypt provides the certificate after validation succeeds.
- Certificate renewed: Netlify renews it automatically as needed.
The important dependency is between the second and third stages. Netlify can begin the process automatically, but it can't complete validation while public DNS still directs the hostname to another provider. The dashboard may show a pending or failed state until the records become authoritative and visible.
Domain aliases follow the same logic. A valid alias can be included in the site's certificate, but an alias with incomplete or conflicting DNS won't be covered just because the primary domain works. Certificate coverage should therefore be evaluated hostname by hostname.
For readers who need a wider explanation of renewal mechanics across hosting environments, the UpTime Web Hosting SSL guide offers useful background. The practical distinction remains important: automated renewal removes routine certificate administration, but it doesn't correct a domain that no longer resolves according to the deployment policy.
A separate guide to custom SSL certificates and domain names can also help clarify when a platform-managed certificate is sufficient and when an organization may require a different certificate arrangement. For a standard Netlify-managed custom domain, DNS accuracy is usually the decisive factor.
Essential DNS Record Configurations
The record type depends on what the visitor enters in the browser. The apex domain and the www hostname are different DNS names, so they shouldn't be treated as interchangeable.
| Record Type | Host / Name | Value / Target |
|---|---|---|
| A | Apex domain, such as example.com |
75.2.60.5 |
| CNAME | www |
The site's *.netlify.app hostname |
An A record maps the bare domain to the expected Netlify address. A CNAME maps the www hostname to the Netlify hostname assigned to the site. The exact site hostname should be copied from the Netlify domain settings rather than guessed or replaced with another site's address.
What commonly goes wrong
The most frequent error is placing the CNAME on the apex when the DNS provider doesn't support the required behavior, or entering an old hosting target under www. Another is leaving multiple apex records in place. A resolver may then receive an inconsistent answer, and the certificate authority may not reach the Netlify endpoint during validation.
Proxy services can create another layer of uncertainty. If a DNS provider masks the expected origin or applies its own routing, the result may look correct in a dashboard while external validation still sees something different. The record should be checked from outside the local network, and both hostnames should be reviewed separately.
The records are only the starting point. Nameserver authority matters just as much. If the records were edited at a provider that isn't listed among the domain's authoritative nameservers, the change won't affect public resolution or certificate issuance.
Troubleshooting SSL and DNS Failures
When issuance fails, the application should be removed from the diagnosis first. A broken build, missing asset, or routing issue can affect the page, but it won't explain why a certificate authority can't validate the domain. The certificate path begins with Netlify's domain settings and public DNS.
Start with Netlify's HTTPS status
Open Domain management and inspect the HTTPS status for the affected domain. This shows whether Netlify has issued a certificate, is waiting for validation, or has encountered a provisioning failure. The status is useful, but it should be treated as an indicator rather than the full diagnosis.
Next, confirm the authoritative nameservers. Then inspect the apex A record and the www CNAME from multiple regions using external DNS tools. If one resolver shows Netlify and another shows an old provider, propagation or conflicting DNS is still in progress.
Netlify automatically retries failed issuance every 10 minutes during the first 24 hours and hourly for the next two days. Those retries help after a temporary visibility delay, but they can't overcome a persistent wrong record, an outdated nameserver delegation, or a competing DNS configuration. Waiting longer isn't a fix when the authoritative answer is incorrect.
Check CAA separately
CAA records are an advanced but common blocker. They tell certificate authorities which issuers are allowed to provide certificates for a hostname. If a restrictive CAA record exists at the relevant DNS level, Let's Encrypt may be denied even when the A and CNAME records appear correct.
Certificate authorities evaluate CAA at the requested hostname and stop at the first DNS level containing CAA records. That means a restriction on example.com can affect the apex request, while a separate restriction on www.example.com can affect the www request. Both levels need inspection with dig CAA.
A correct A record doesn't override a restrictive CAA policy. DNS routing and certificate-authority permission are separate checks.
A practical diagnostic sequence is:
- Inspect HTTPS status: Confirm what Netlify reports for the domain.
- Verify authority: Check that the edited DNS provider controls the domain's authoritative nameservers.
- Resolve both names: Test the apex and
wwwrecords from multiple locations. - Inspect CAA: Look for stale restrictions at both requested hostnames.
- Remove competing paths: Eliminate old apex records, incorrect CNAME flattening, DNSSEC validation failures, and proxy settings that hide the expected origin.
- Recheck coverage: After correction, compare Netlify's certificate status with an external TLS inspection.
The last step matters because a certificate covering one hostname doesn't prove that the certificate includes every required subject alternative name. A launch can remain partially broken if example.com works while www.example.com has a mismatch or lacks coverage.
Validating Before You Go Live
A production launch should have a clear pass condition, not just a green-looking dashboard. The site needs to respond securely at both the apex and www hostnames, and visitors using HTTP should be redirected to HTTPS without a certificate-name mismatch.
Use a hostname-by-hostname checklist
Test the exact URLs that customers, campaigns, embeds, and support teams will use. The minimum validation set includes:
- Apex HTTPS: ` loads the intended Netlify site.
- WWW HTTPS: ` loads the intended site with valid certificate coverage.
- HTTP redirect:
andredirect to HTTPS. - Certificate names: The certificate covers every required hostname, including the apex and
www. - DNS consistency: External lookups return the expected Netlify destinations rather than an old host, parking provider, or conflicting record.
The redirect test catches a different class of problem from certificate issuance. HTTPS may work while HTTP still exposes an unexpected destination or fails to redirect. Visitors don't distinguish between DNS, certificate, and redirect layers. They experience the result as an unavailable or untrusted site.
Confirm the deployment path, not just the browser
Netlify's certificate status should be checked alongside an external TLS inspection. The external check verifies what visitors receive and can expose a name mismatch, incomplete hostname coverage, or a certificate served by an unexpected origin. Browser testing remains useful, but a single successful browser session may reflect cached DNS or a preferred hostname.
Before switching campaign traffic, the launch owner should also confirm that every public link uses the intended canonical hostname. This prevents a secure apex domain from coexisting with an unvalidated www link in advertisements, QR codes, email signatures, or embedded tour pages.
For businesses publishing branded virtual experiences, a platform such as Virtual Tour Easy can provide custom-domain hosting for tours and channel pages with automatic SSL, with subdomain connection handled through a CNAME on its Business plan. That option still follows the same operational principle: the public DNS record must point to the platform before HTTPS can be issued reliably.
The strongest pre-launch signal is agreement between three views: Netlify's domain status, external DNS resolution, and an external TLS inspection. When all three confirm the same hostnames and certificate coverage, the deployment is ready for public traffic.
Virtual Tour Easy helps real estate, hospitality, architecture, education, and venue teams create immersive 360° tours, publish them through custom domains, and share them through links or embeds. Visit Virtual Tour Easy to create a tour and connect a branded HTTPS experience without adding manual certificate administration to the launch process.